The 2nd tab gives access to spaces and zones containing all the components.
Here is how the view is structured:
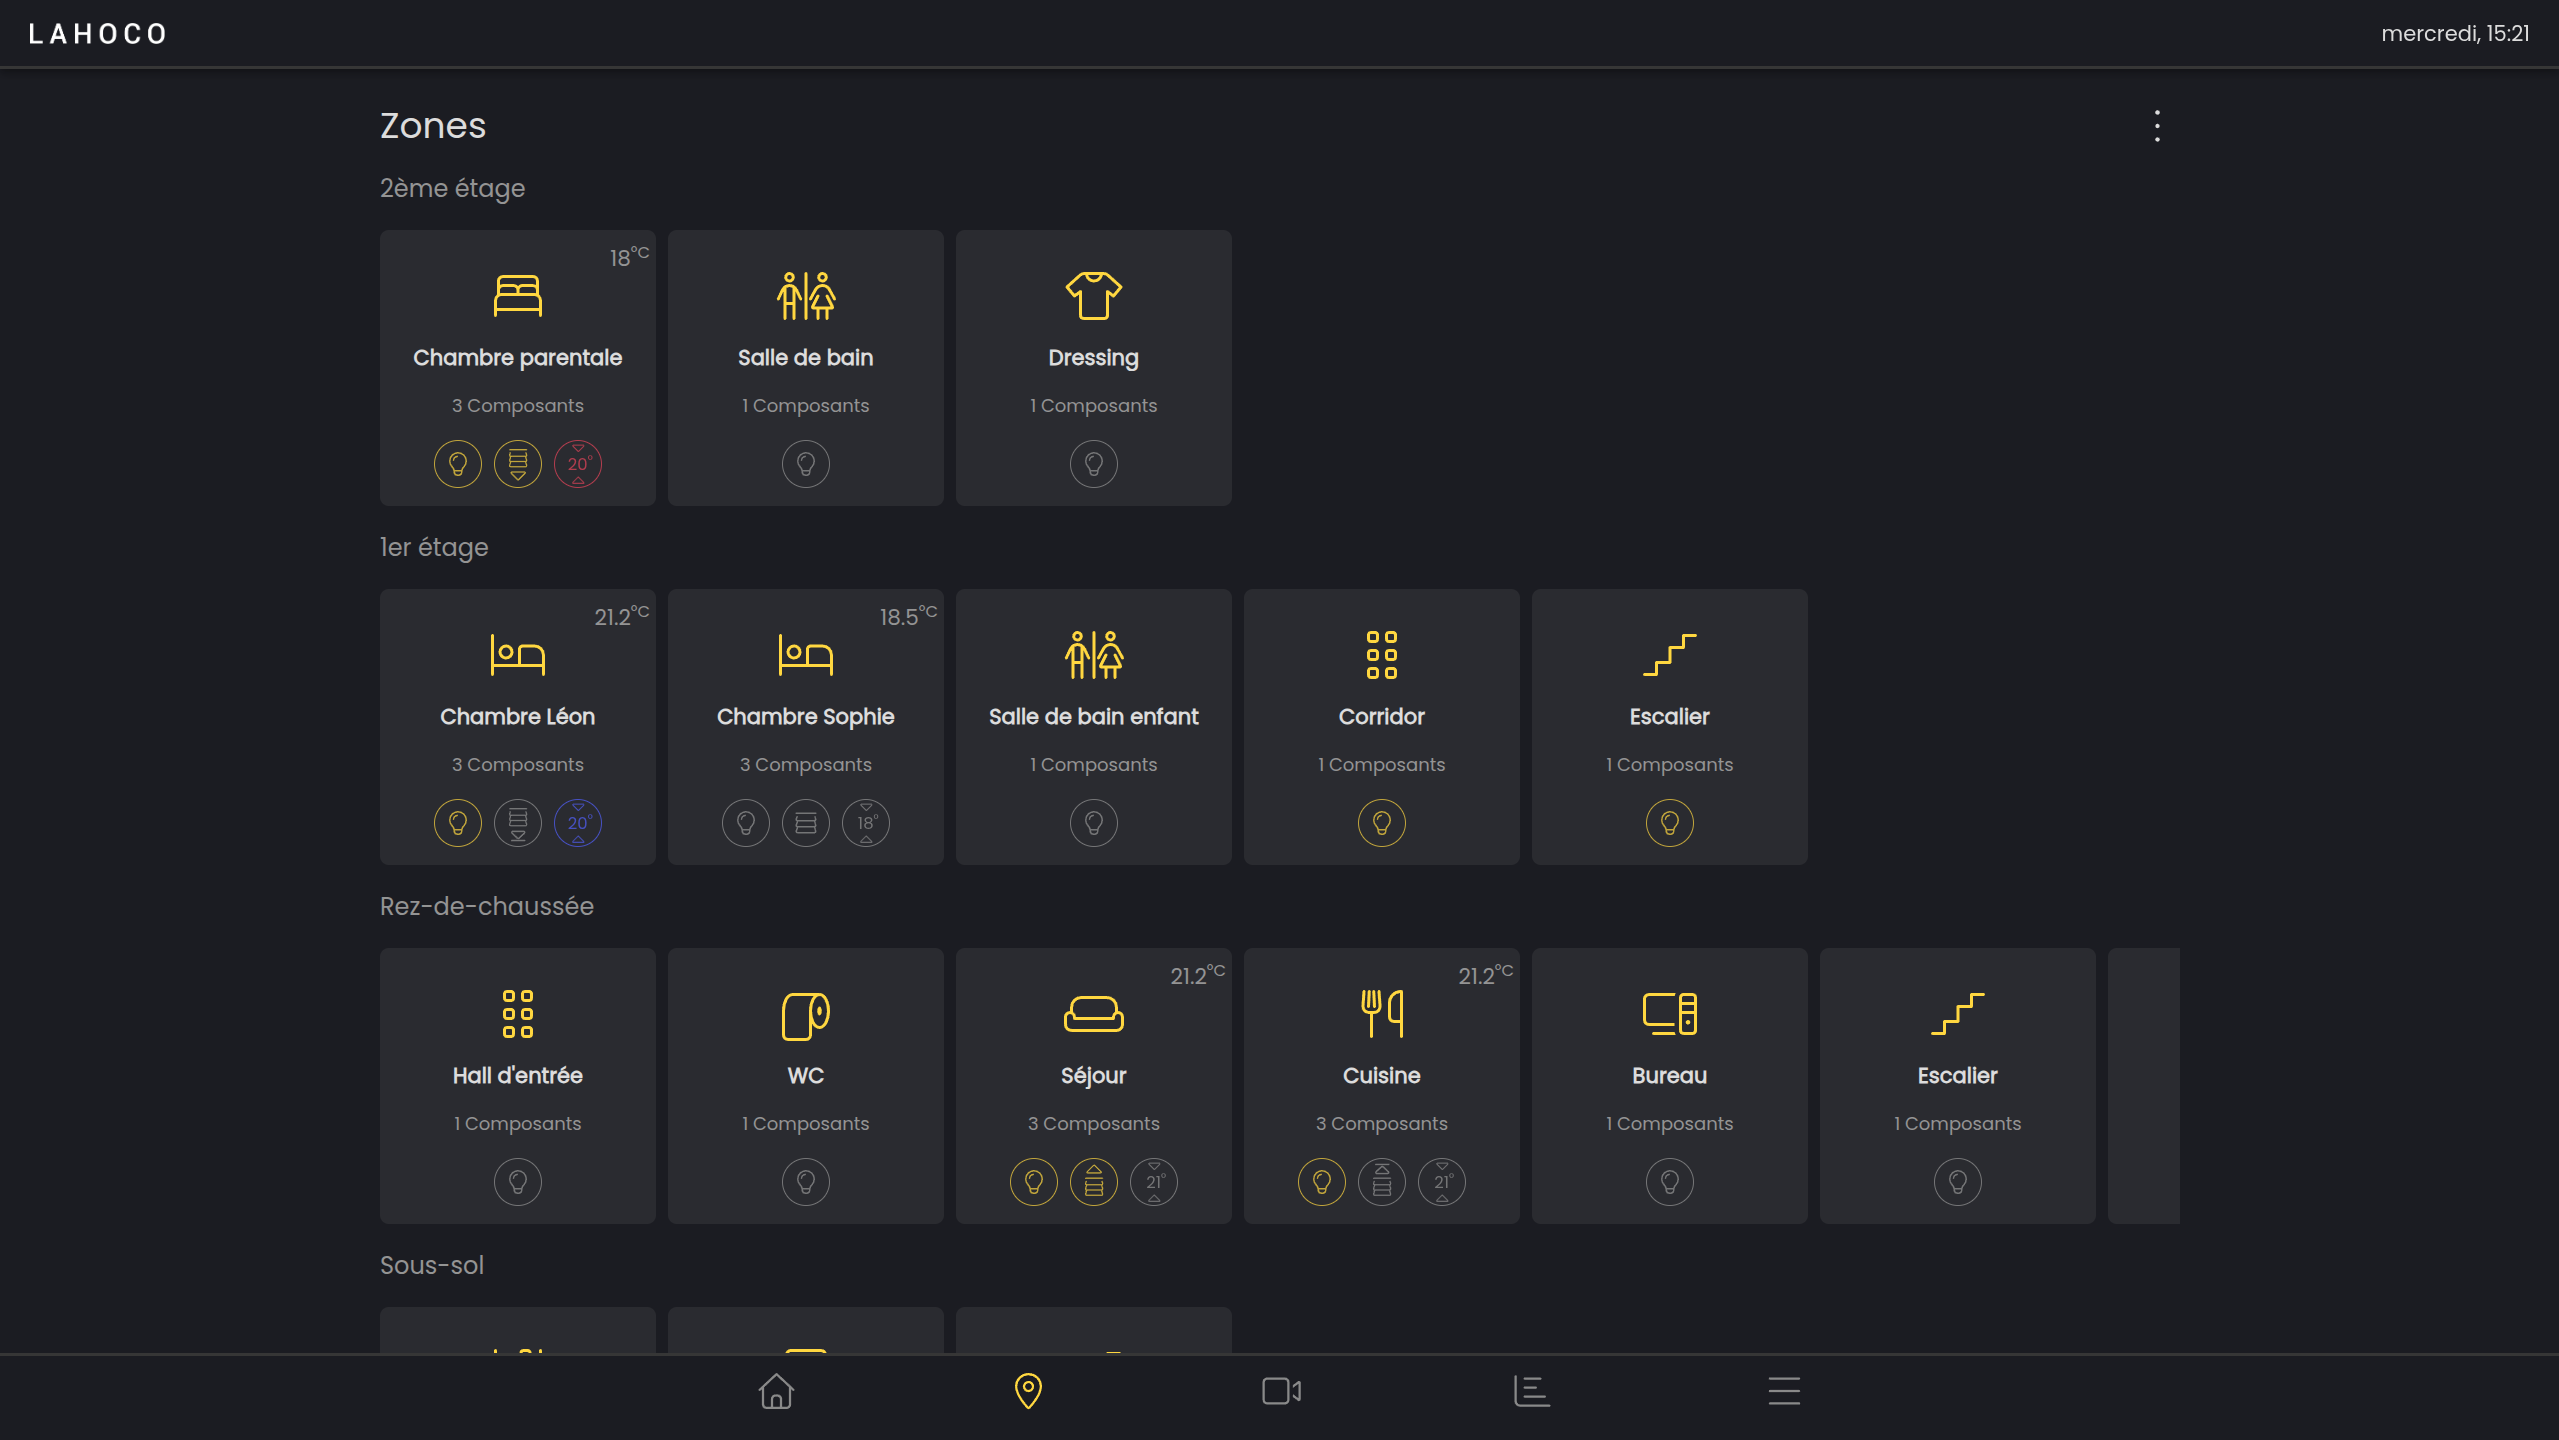
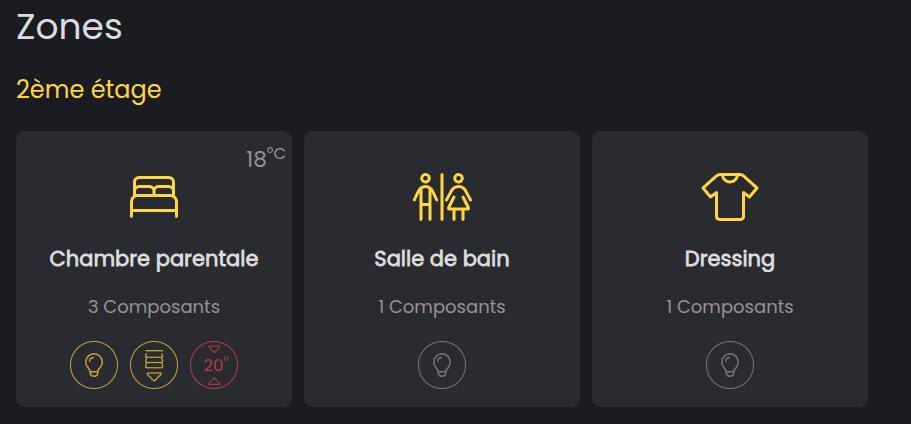
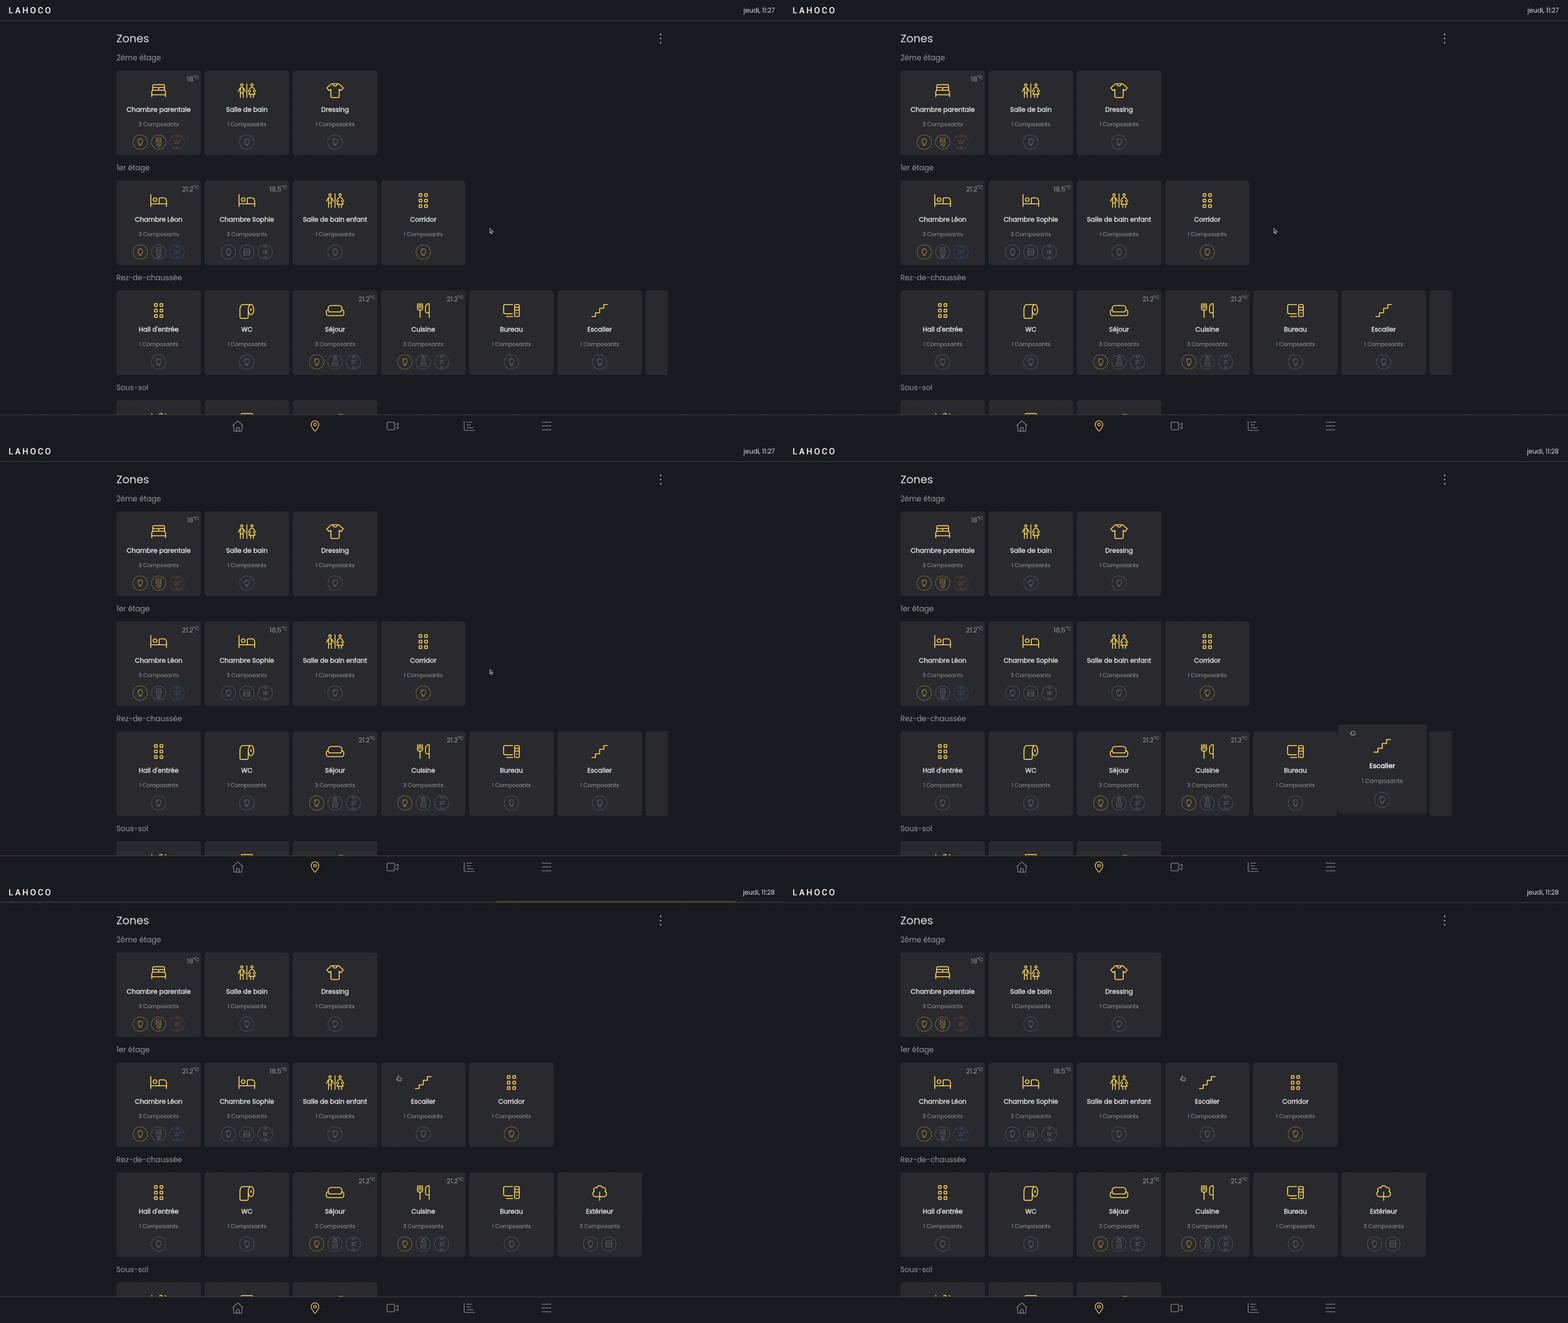
You can see several spaces defined by their name, each containing several zones. For each zone, you can see the number of components contained in the zone along with icons representing the state of the components within it.
In the top right, you can view the average temperature of the room. Just below, a quick overview indicates whether a light is on in the zone, as well as the target temperature and the heating status. Regarding the blinds, you can check whether they are all raised or lowered, as well as their movement status.
Space, zone and component, definition
These 3 terms: Space, zone and component allow you to correctly structure your LAHOCO HOME application. Here is an explanation from smallest to largest to properly understand these 3 terms:
-
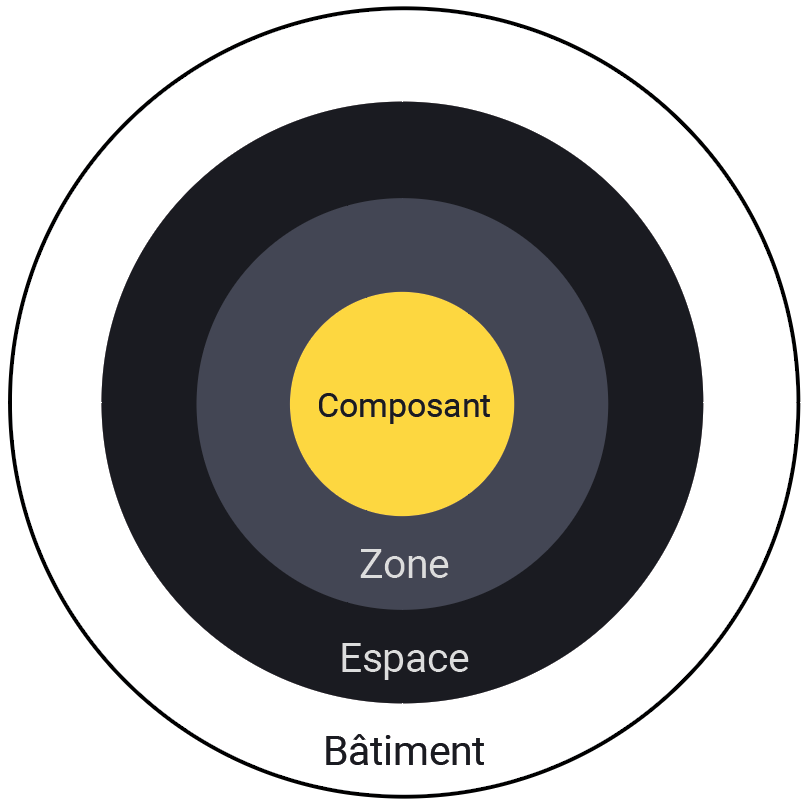
Component: represents a physical component, for example a light, a blind, a heater, etc.
-
Zone: a container for component(s), often representing a room
-
Space: a container for zone(s), representing a sector or a floor
Here is a diagram explaining the hierarchy of the different terms.
Spaces
A space groups together several zones. For example, a floor of a house (space) contains several rooms (zones).
Add a space
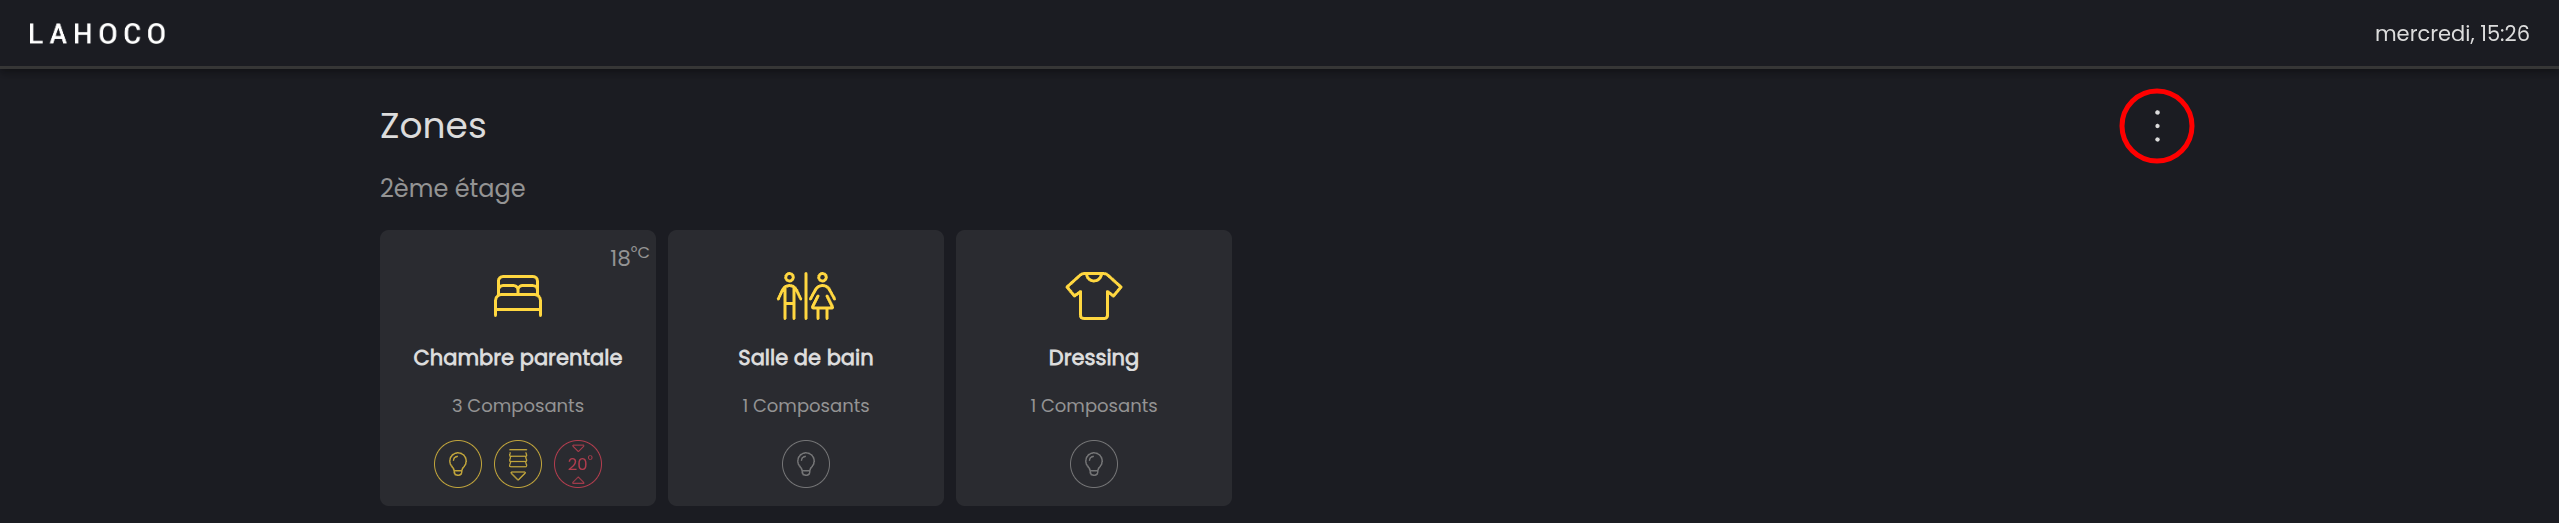
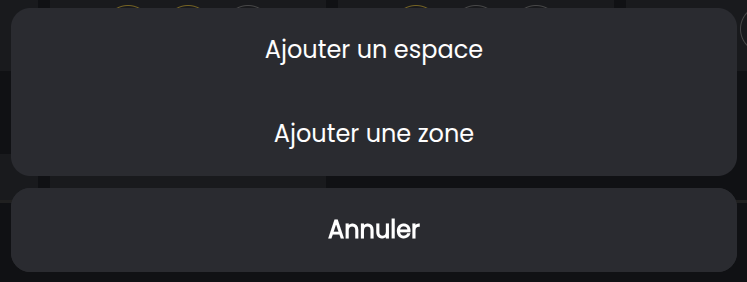
To add a new space, on the spaces and zones page, click the three dots in the top right, then click “Add a space”.
Edit or delete a space
To edit a space, simply click on the name of the space.
You can then edit its name, or delete the space.
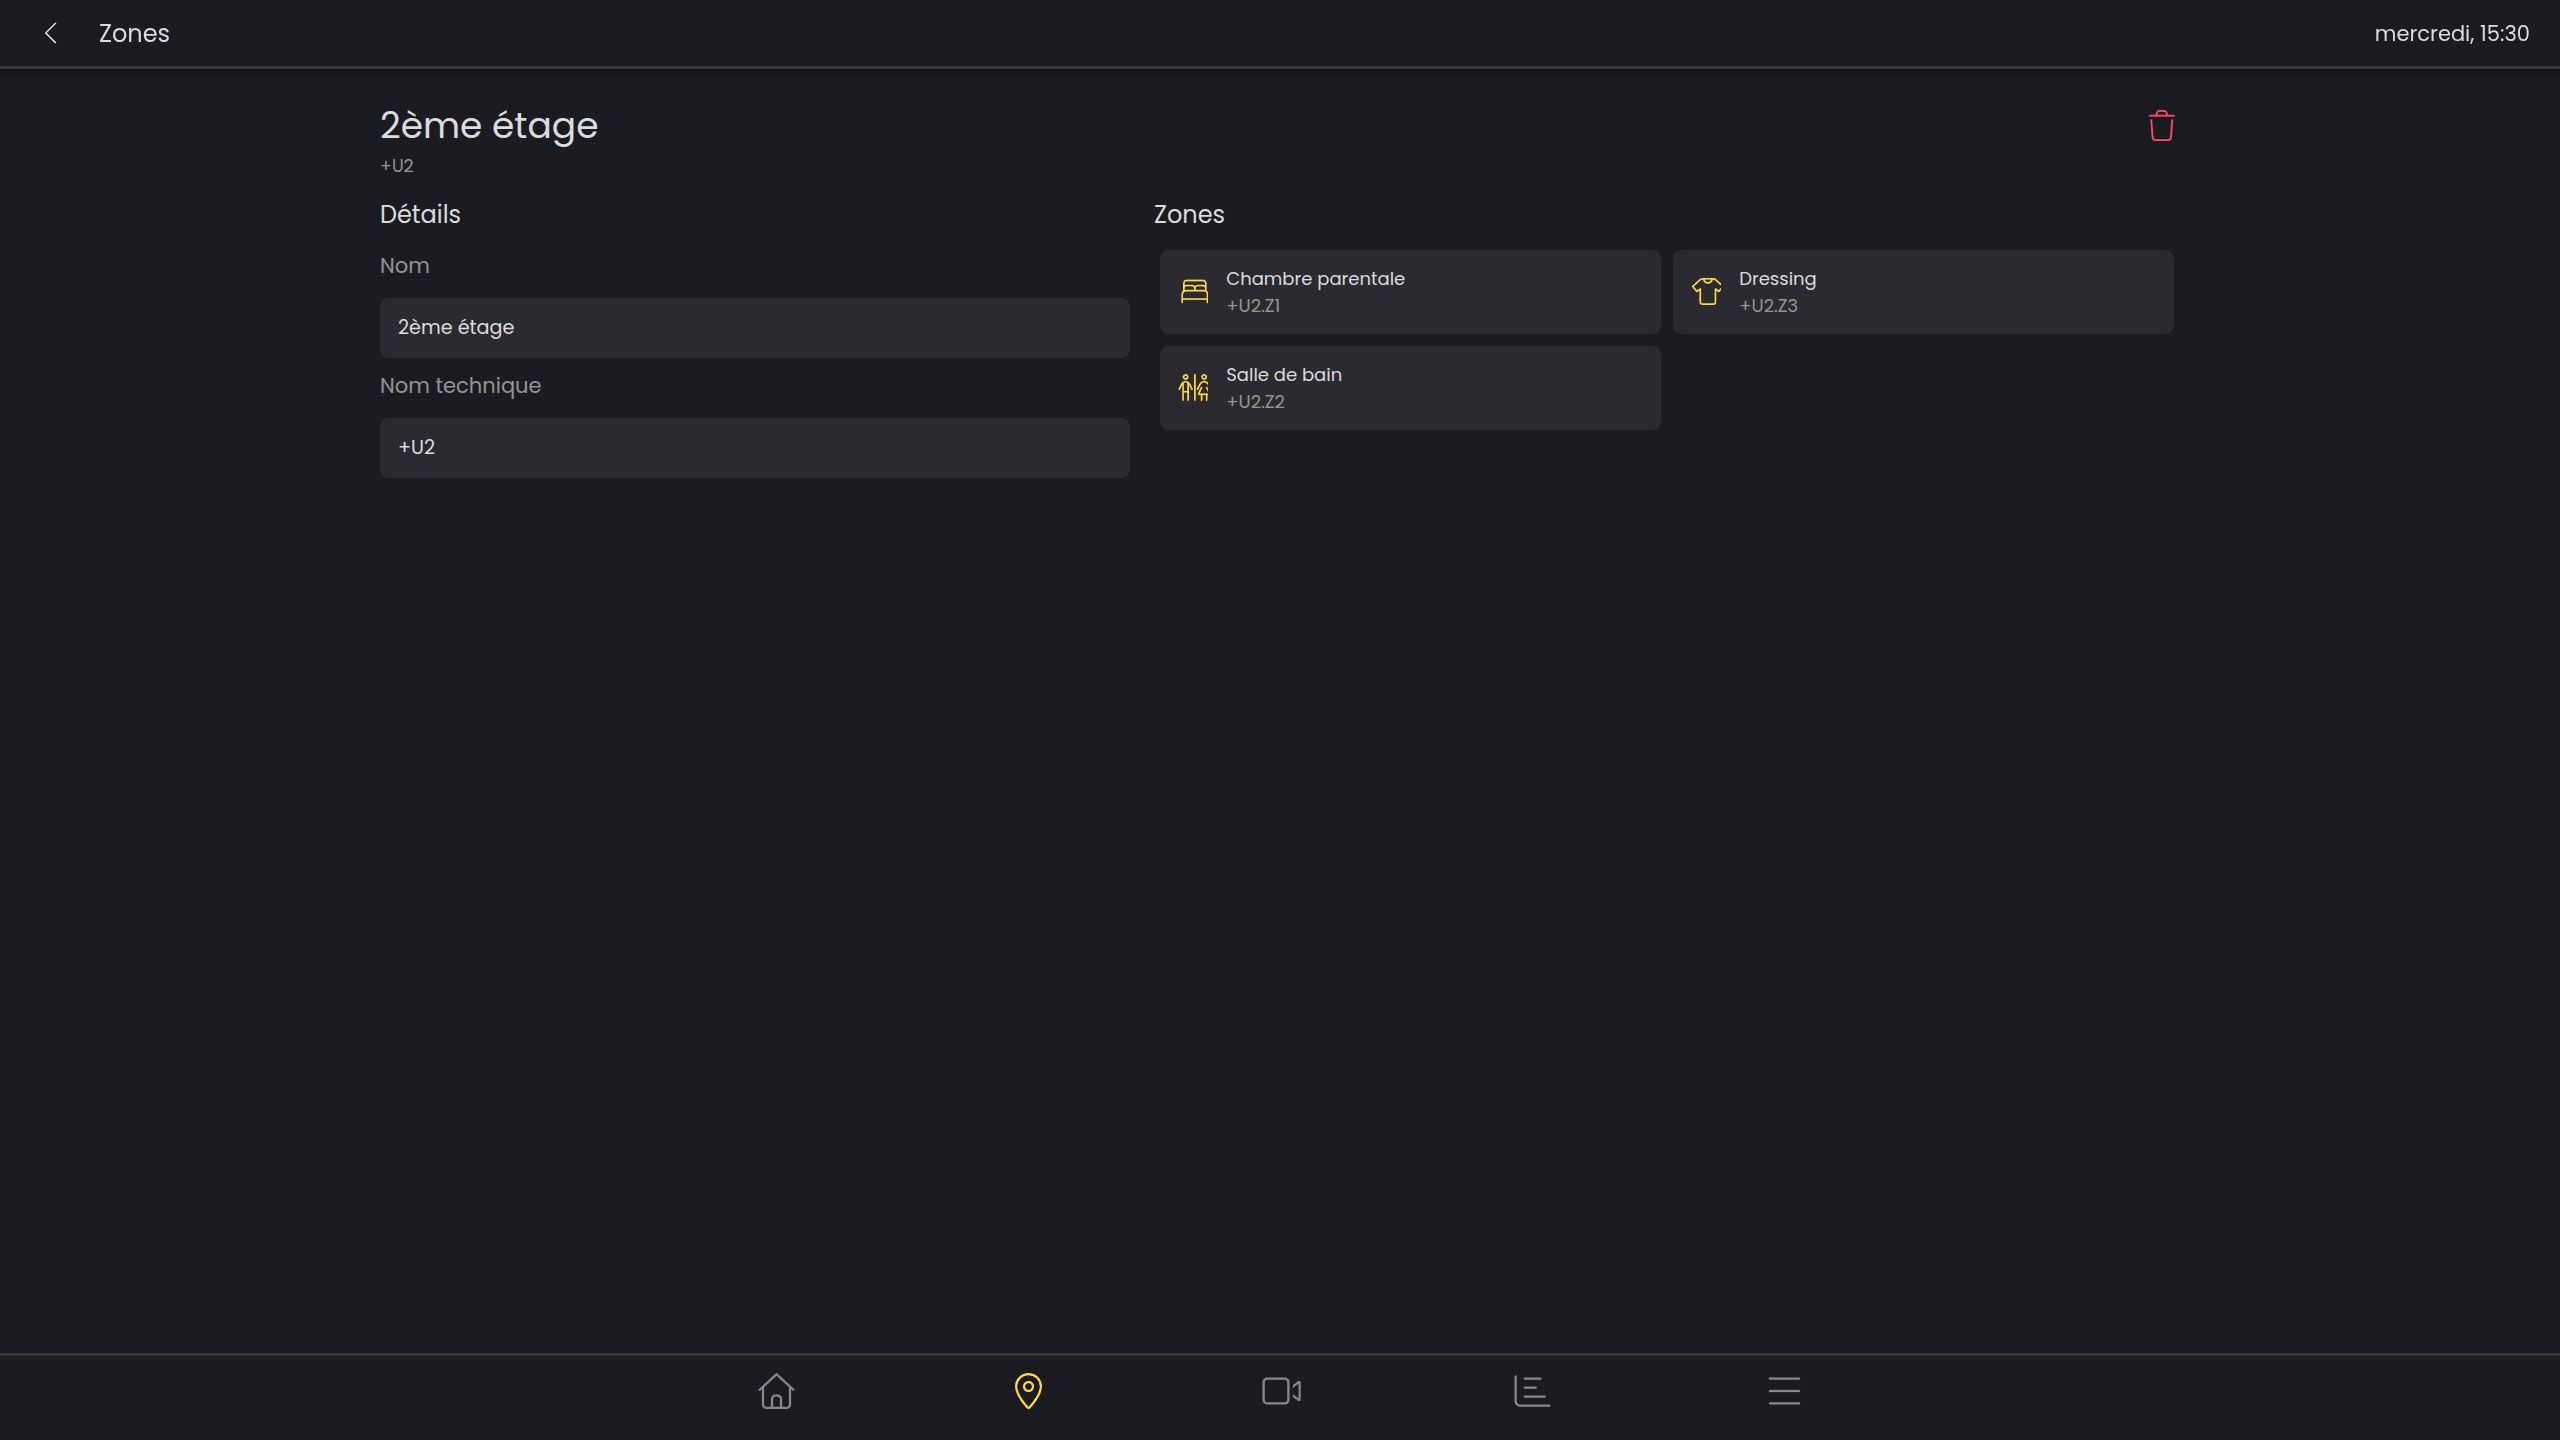
When you delete a space, the zones it contains become “orphaned” and are placed into an “unassigned” space.
Change the order of spaces
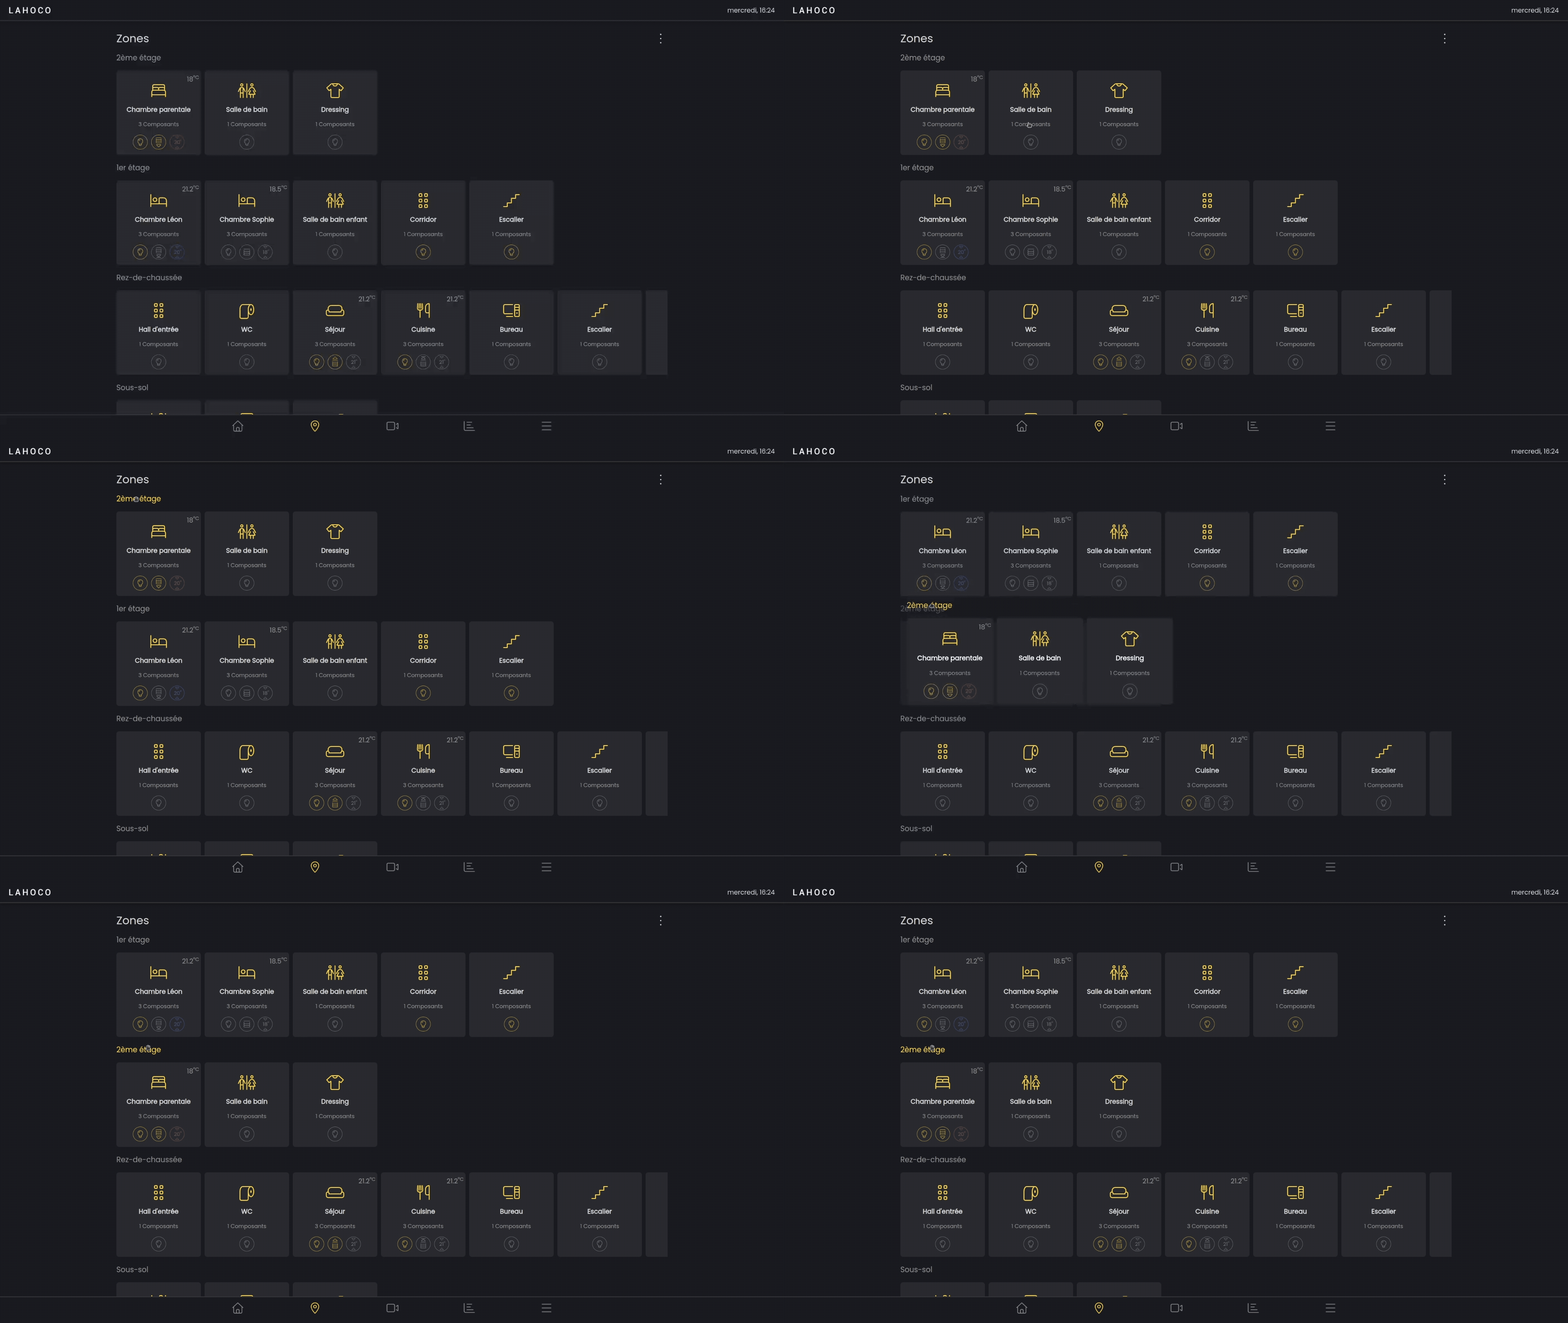
To change the order of spaces, press and hold the space, then move it up/down and release to save.
Zones
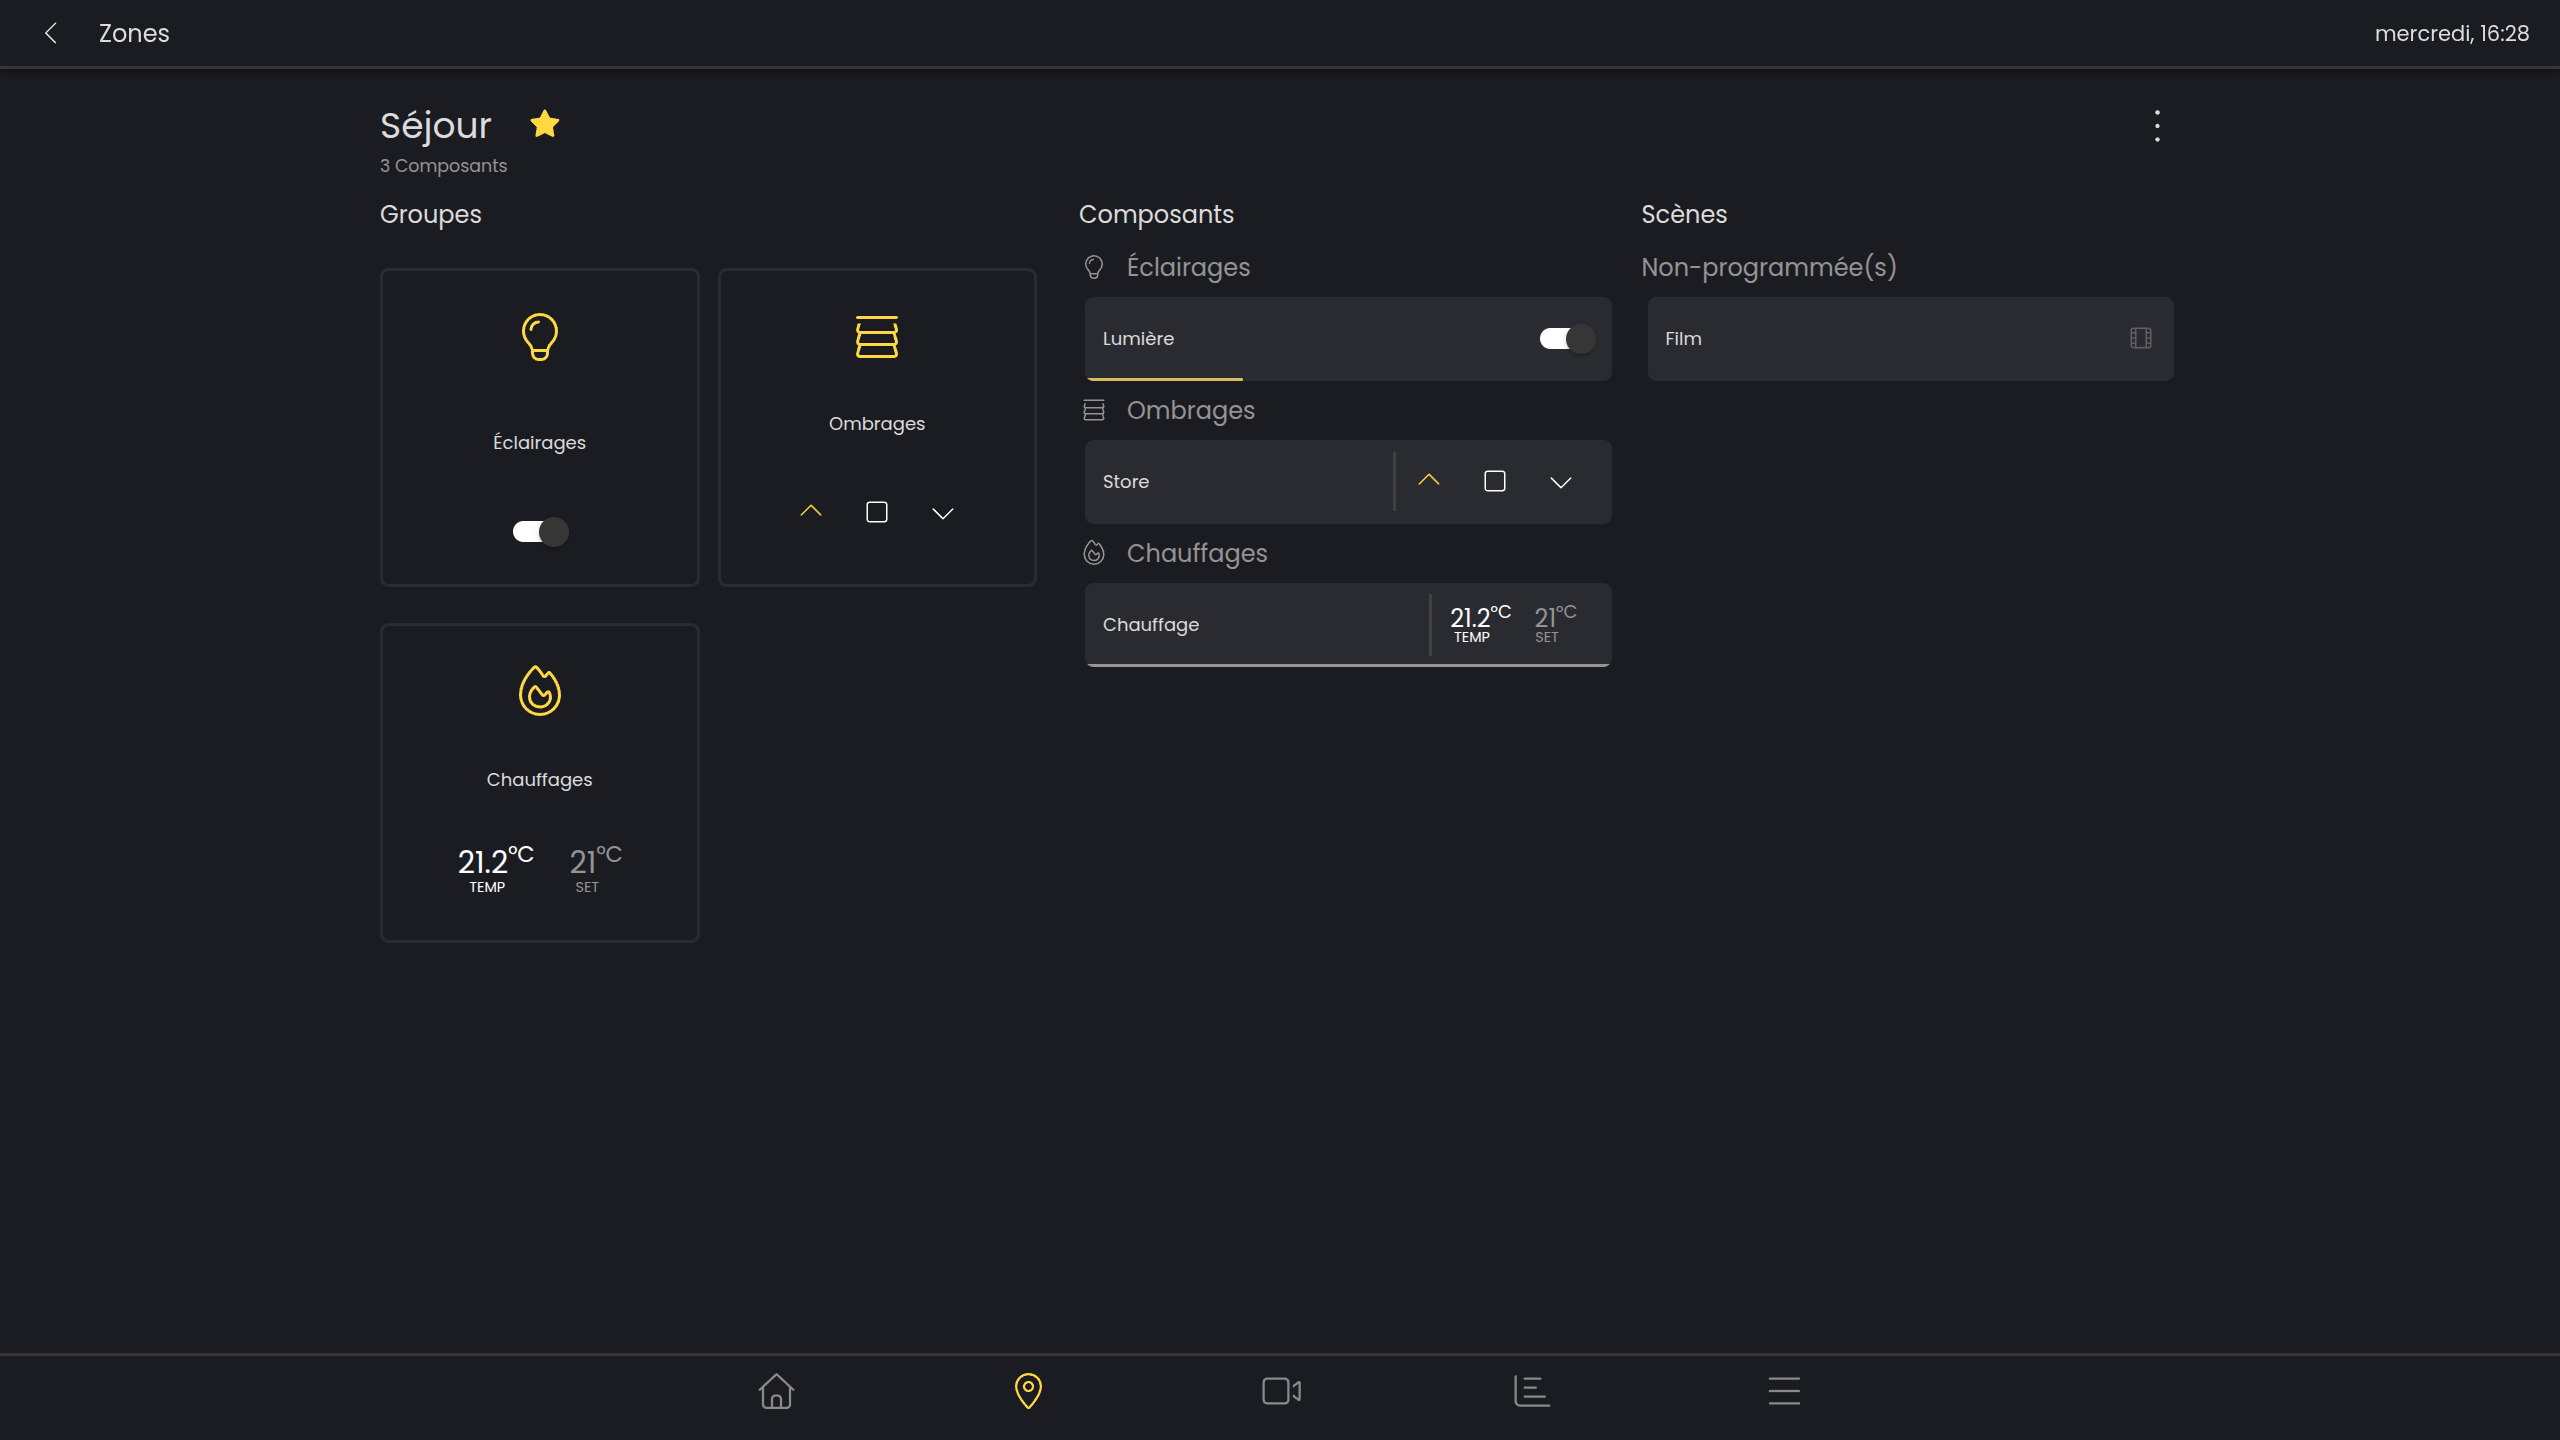
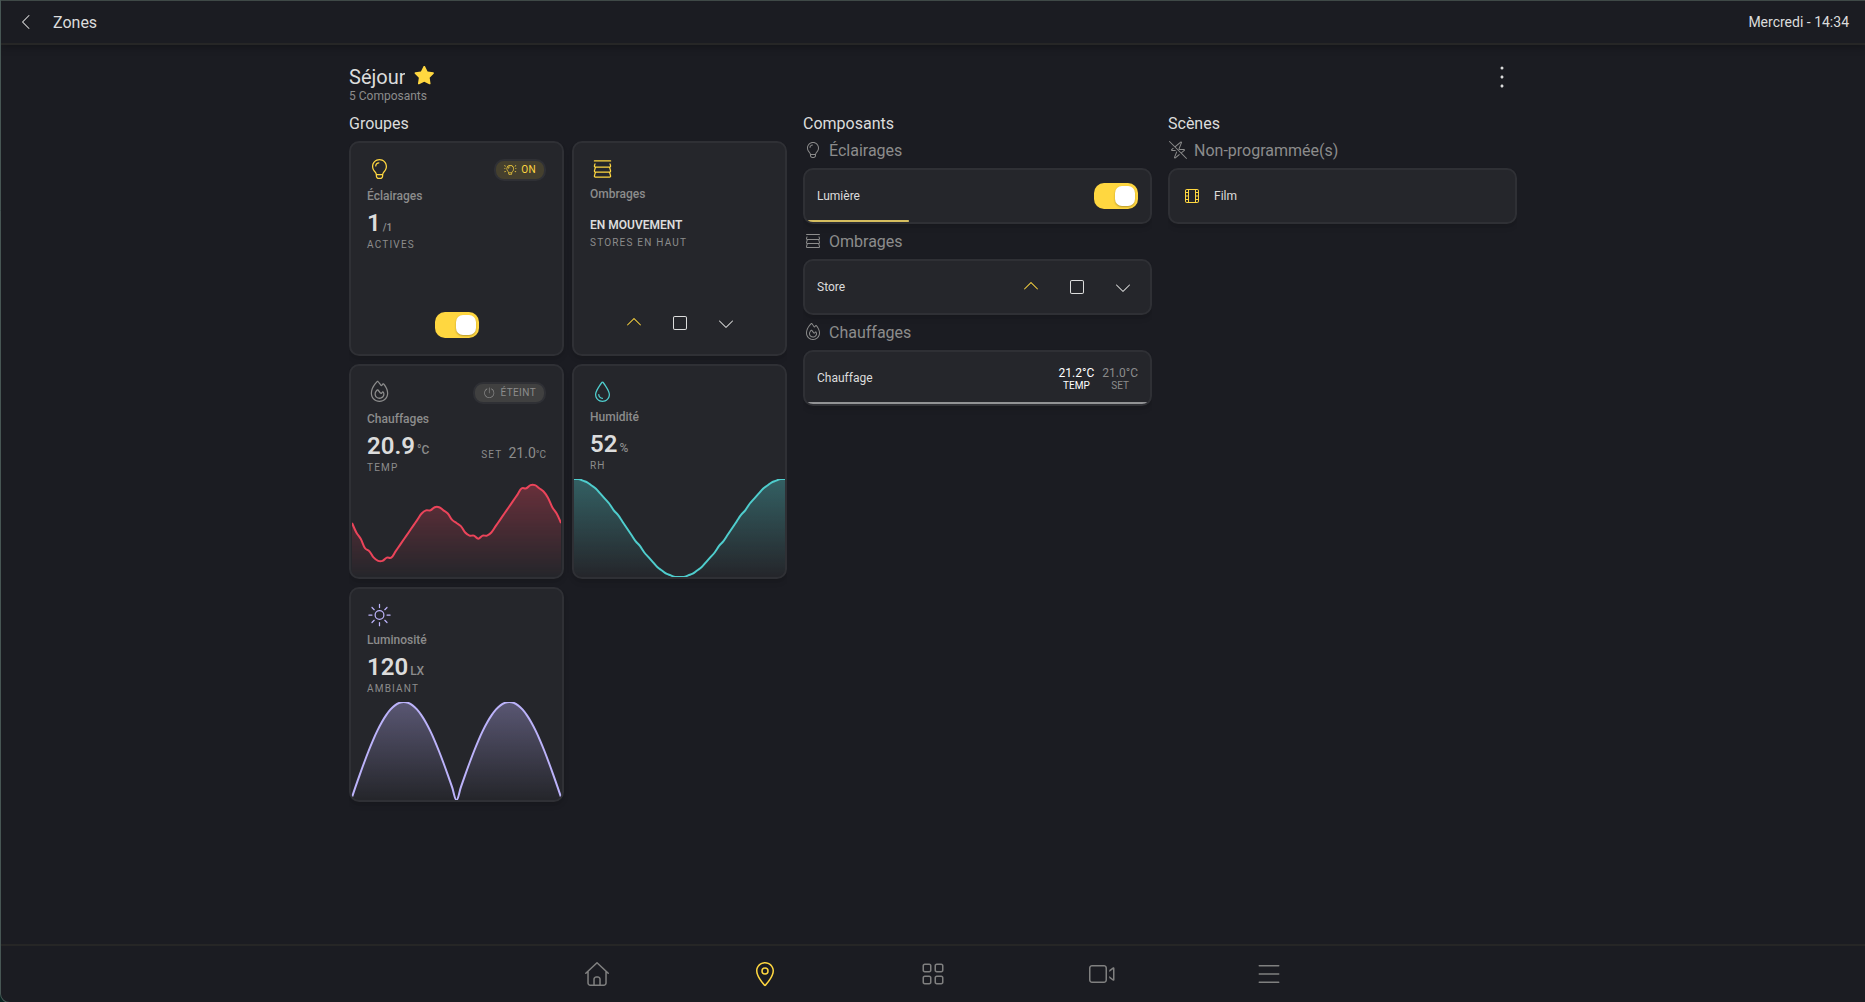
The view of a zone is divided into 3 sections:
-
Groups (quick action on all components in the zone)
-
Components
-
Scenes
Groups
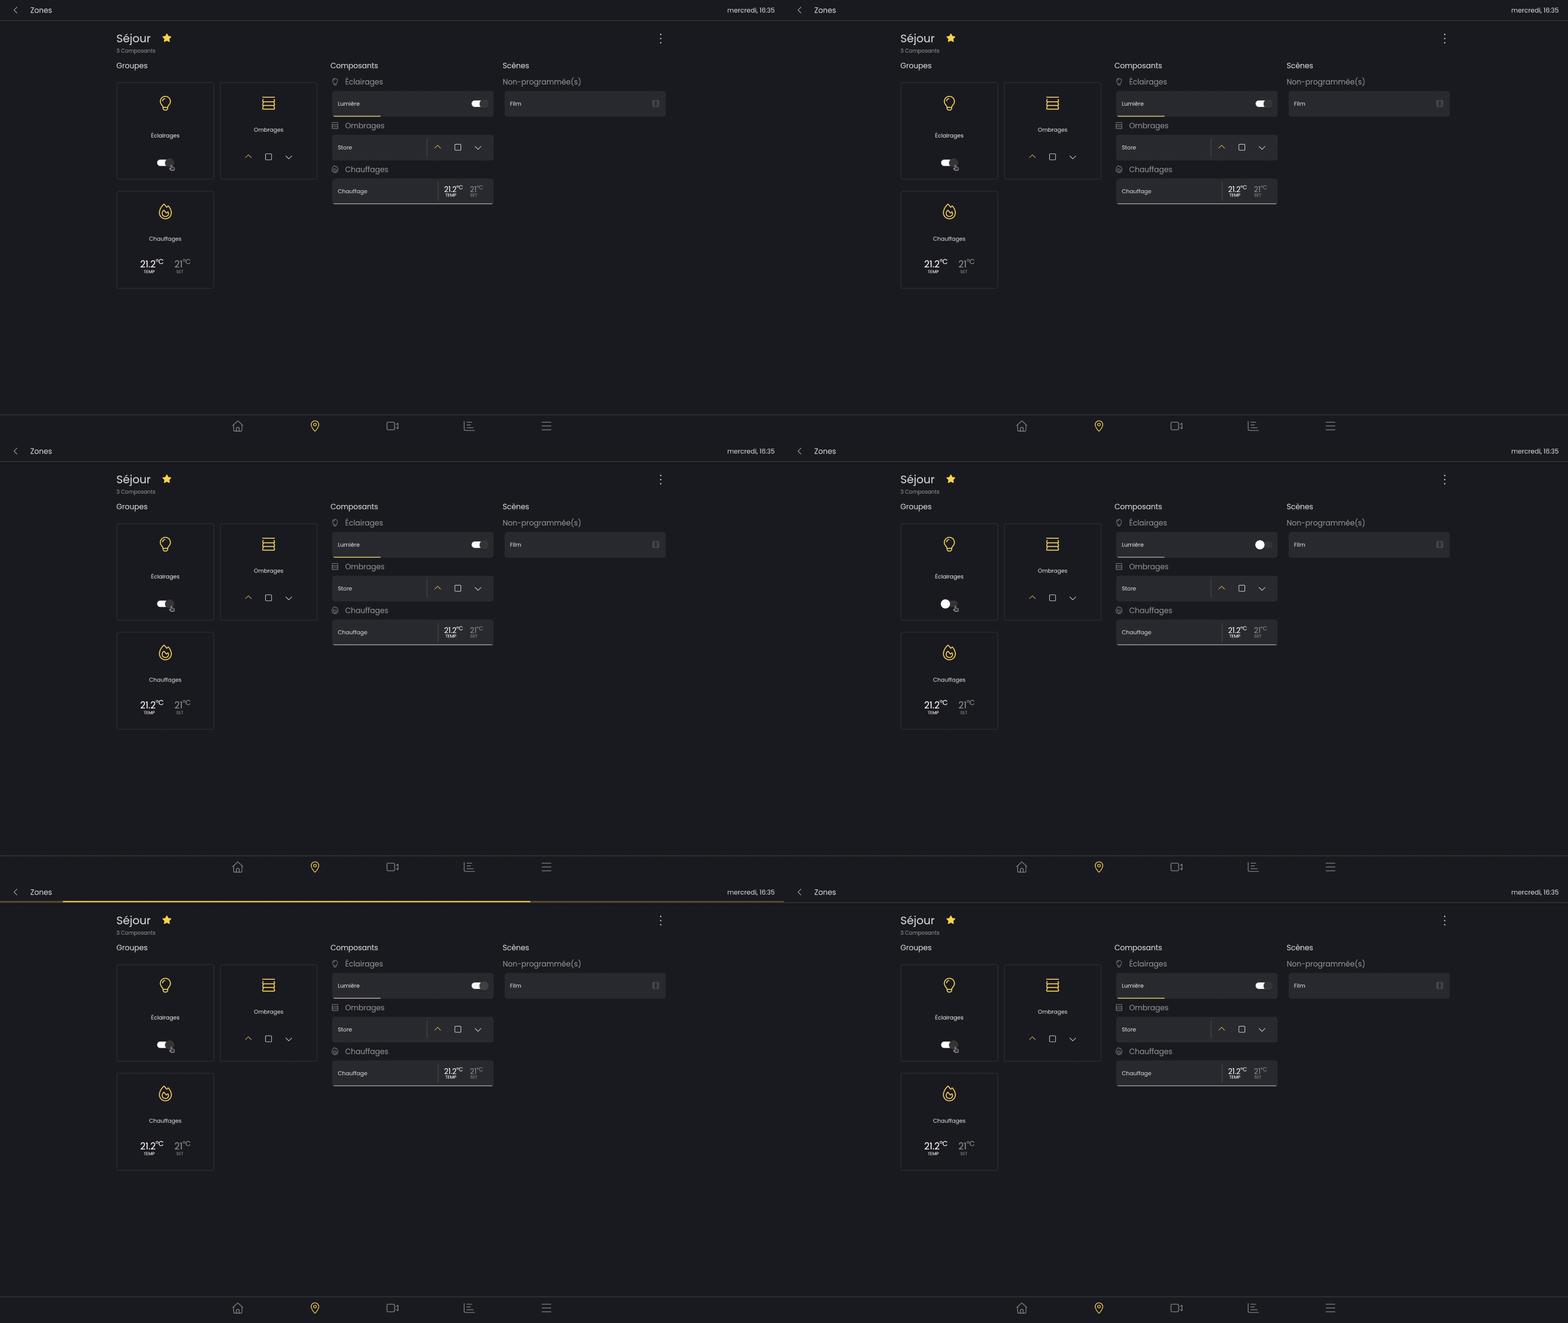
Groups allow you to interact in the same way with all the components of the same type present in the zone. For example, you can turn off all the lights or lower all the blinds in the zone.
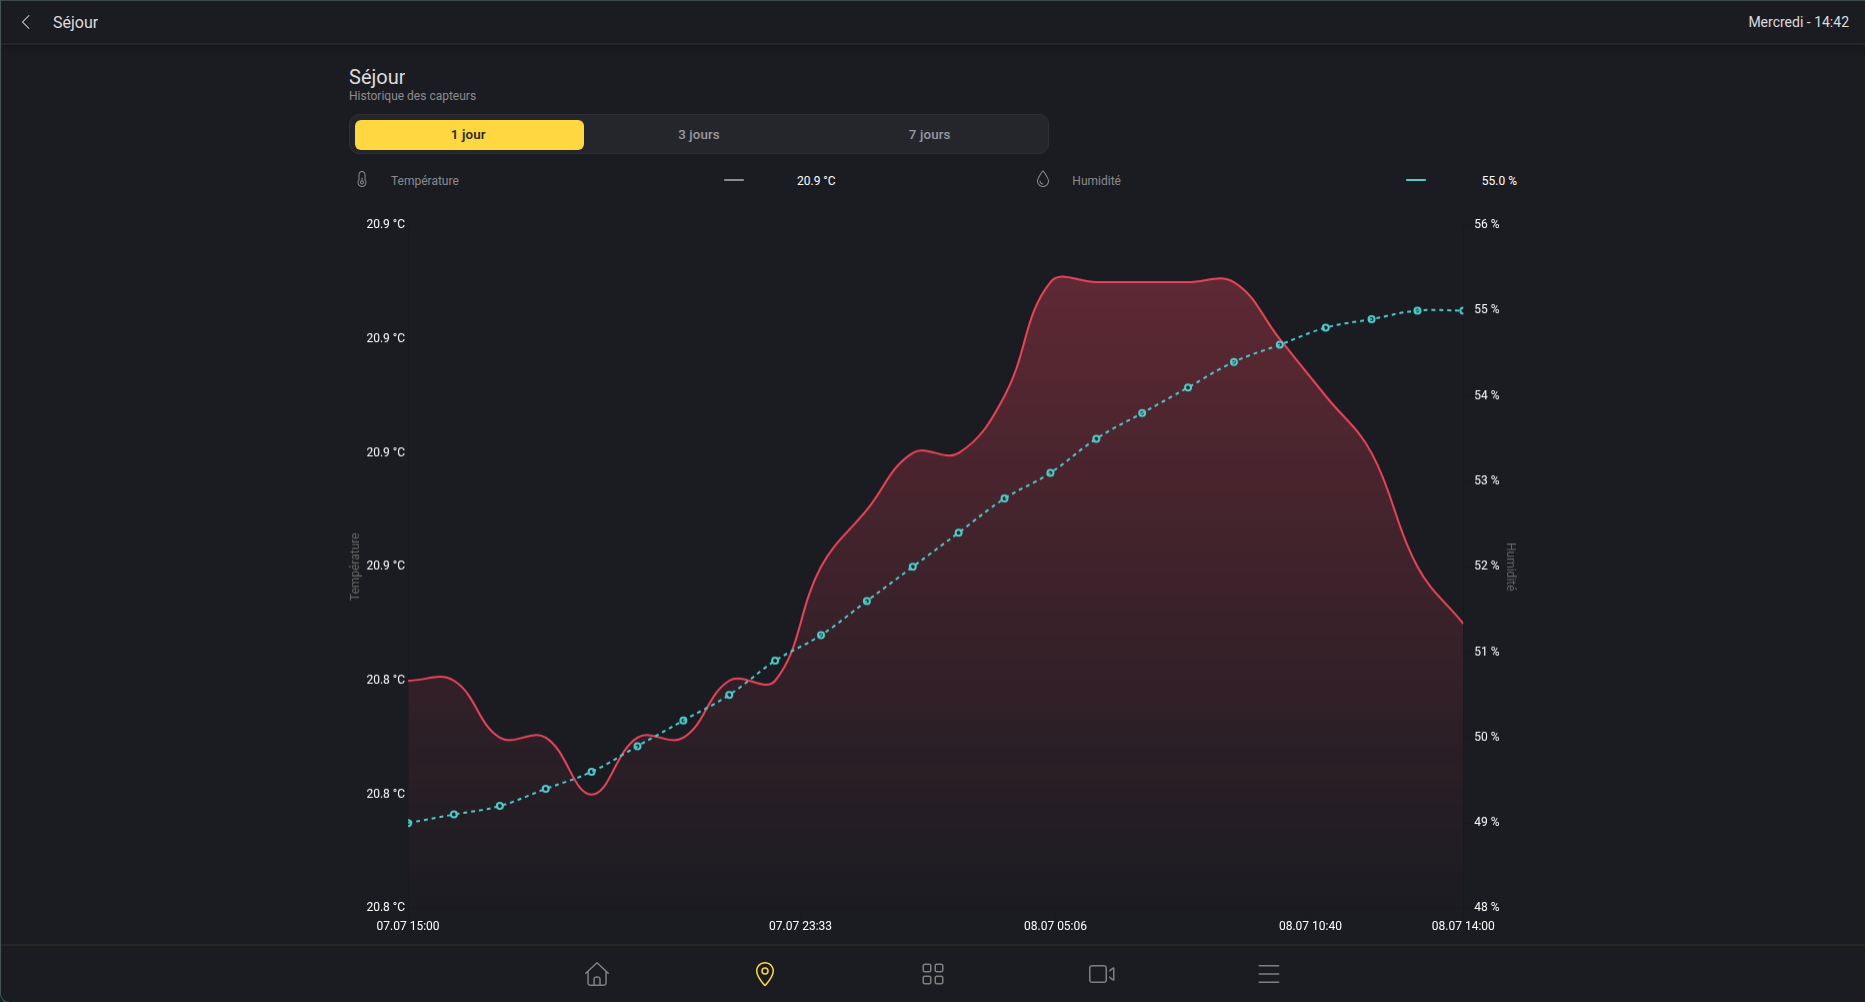
Sensor trends
On groups, you can view the trends of the sensors present in this zone. Click on a group to access a detailed graph of their measurements.
Solar tracking
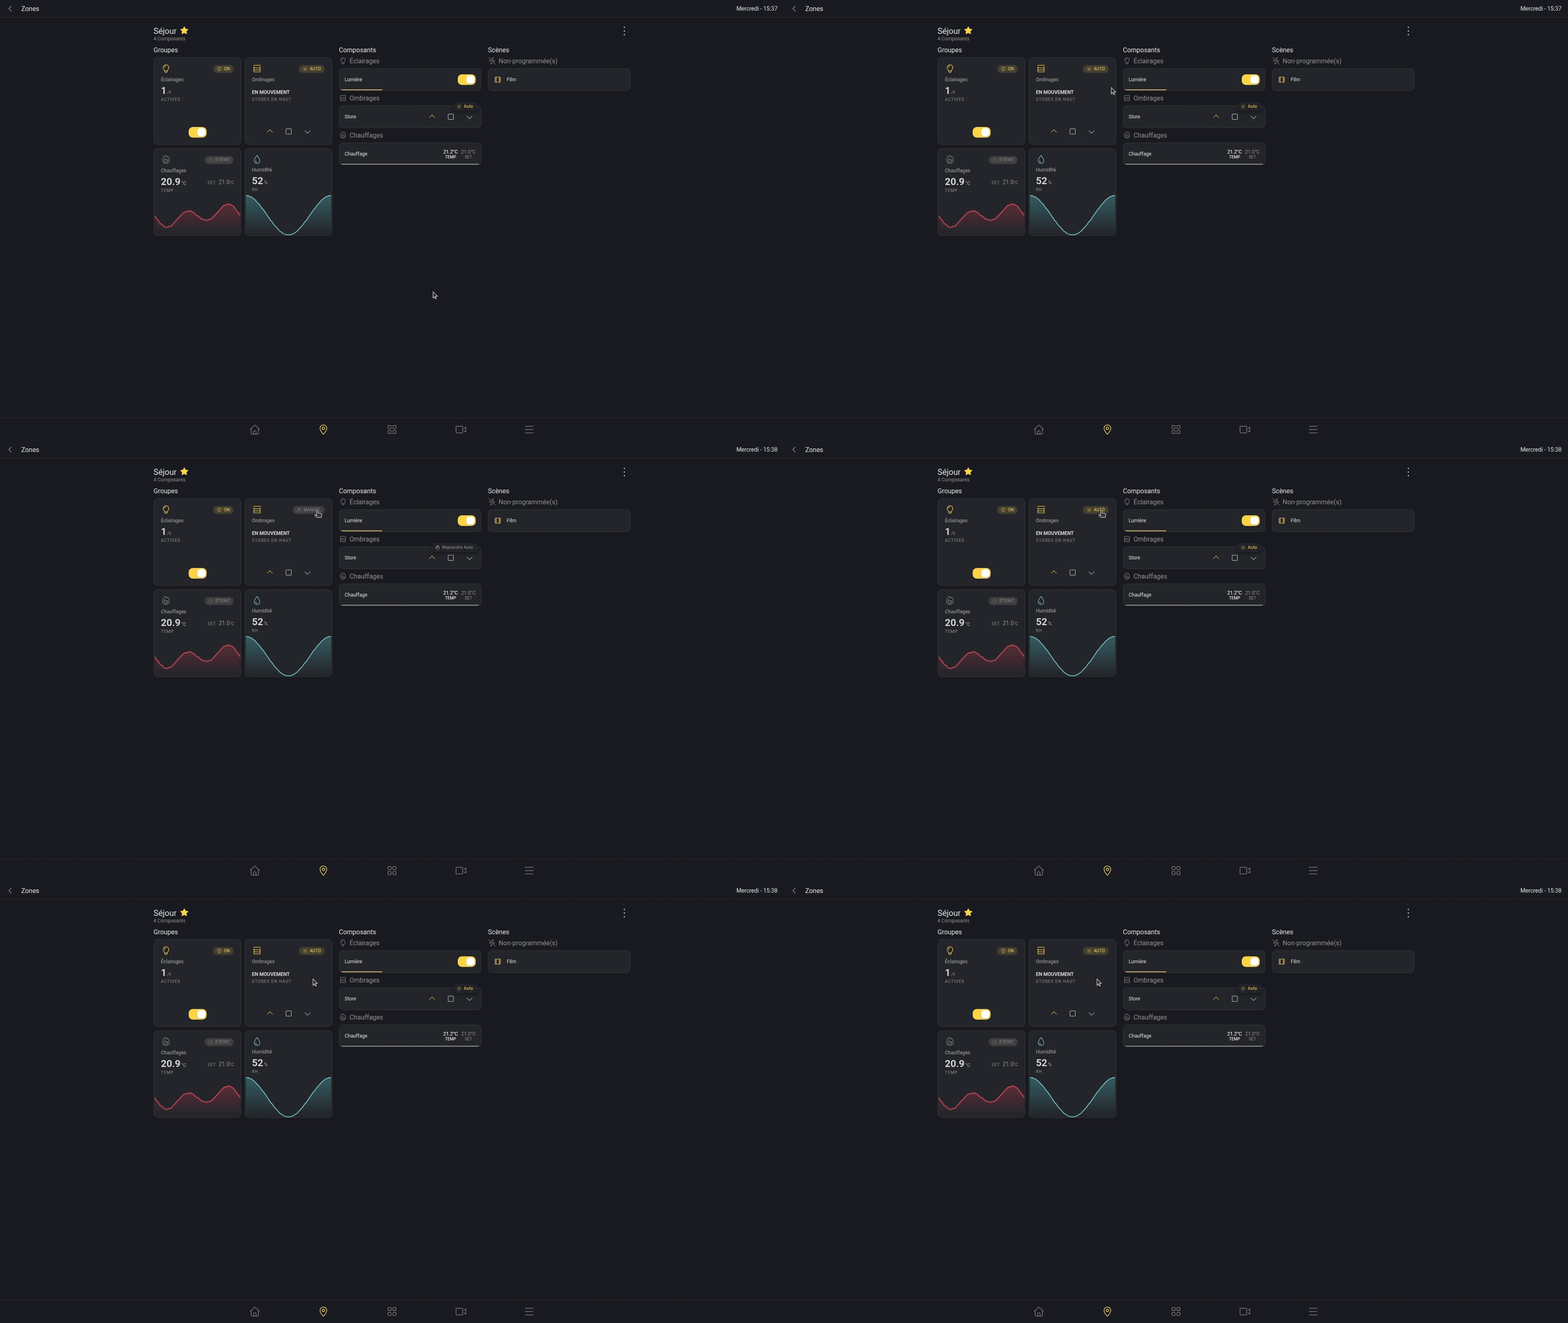
You can quickly switch the solar tracking mode of the zone’s blinds from manual to automatic by clicking on the shading group’s badge.
Any other action performed on the shading devices will automatically switch it to manual mode.
Components
The 2nd section is the components part. In this section, all the components of the zone are listed by component type (lights, blinds, heaters).
For components, 3 different interactions are possible:
-
Quickly control the component
-
Quickly control the component with precise settings
-
Access the component's detail view
In the following illustrations, you can see a grey bar under the component. This bar shows the percentage (brightness for a lamp, closure for a blind).
For a lamp, the bar turns yellow if the light is on. (If the bar is grey, it shows the percentage it will be set to once turned on).
Quick control
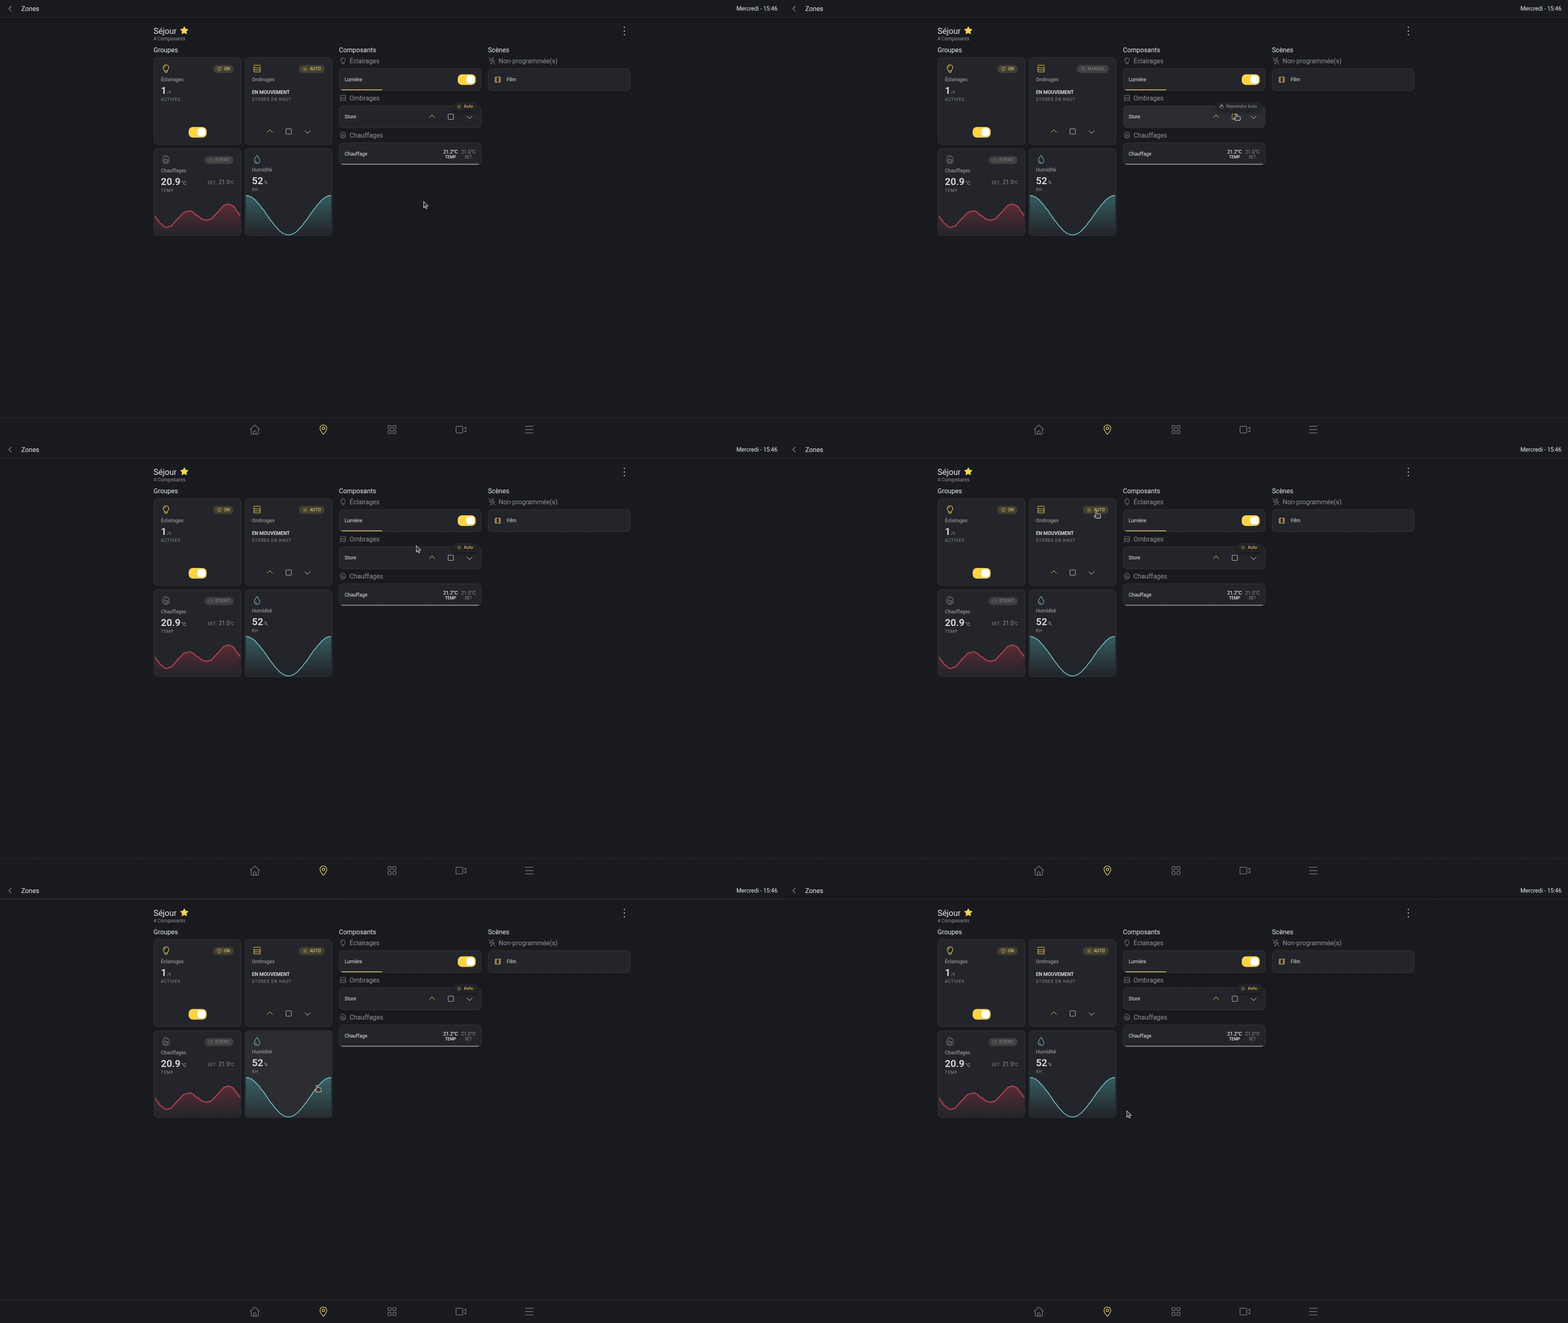
The quick control buttons accessible in the zone view make it possible to manage components quickly and simply, as in the following example:
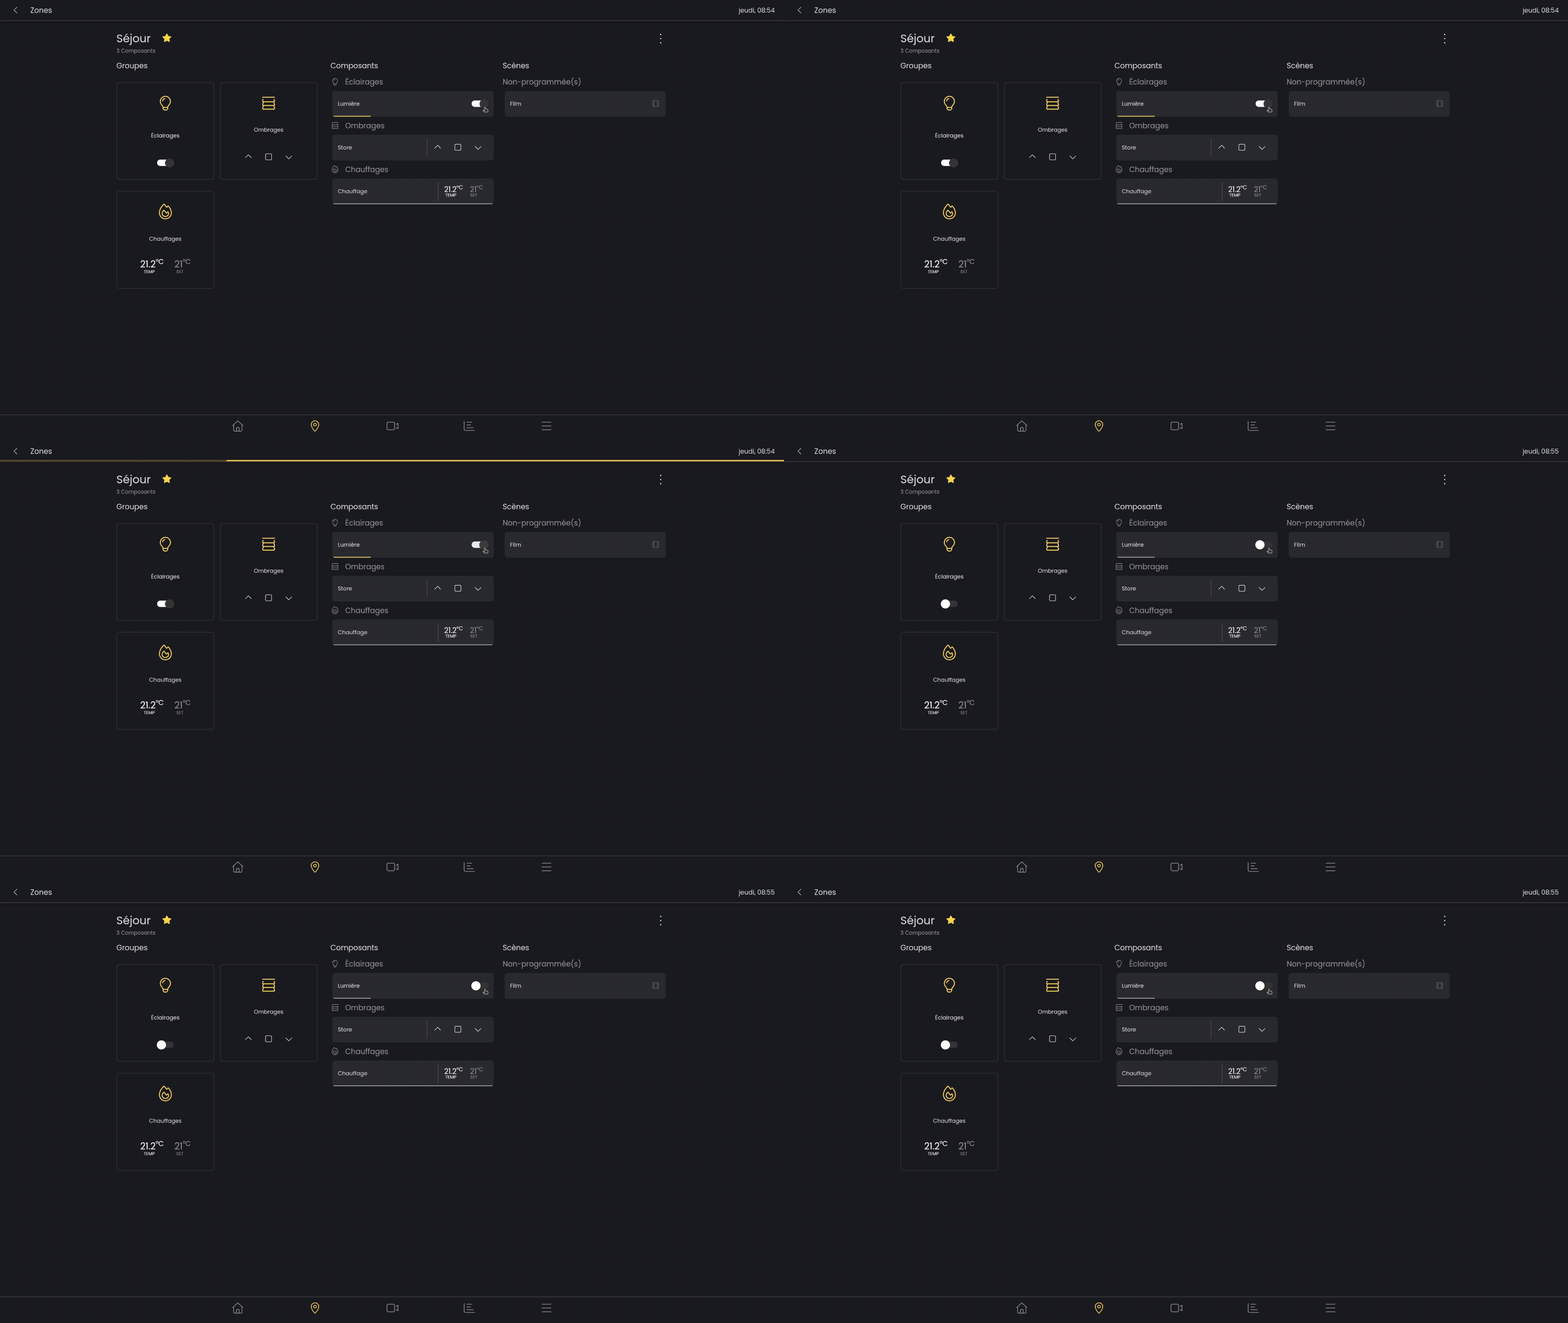
Solar tracking
You can quickly resume the tracking mode of a blind by clicking on the badge located in the top right of the component. It is not possible to switch it directly to manual mode.
On the other hand, any other quick action performed on this blind will automatically switch it to manual mode.
Precise control
It is possible to precisely manage the brightness percentage for a lamp or the closure percentage for a blind. To do this, press and hold, then move from left to right while continuing to hold. Once the desired percentage is reached, simply release to confirm the new state of the component.
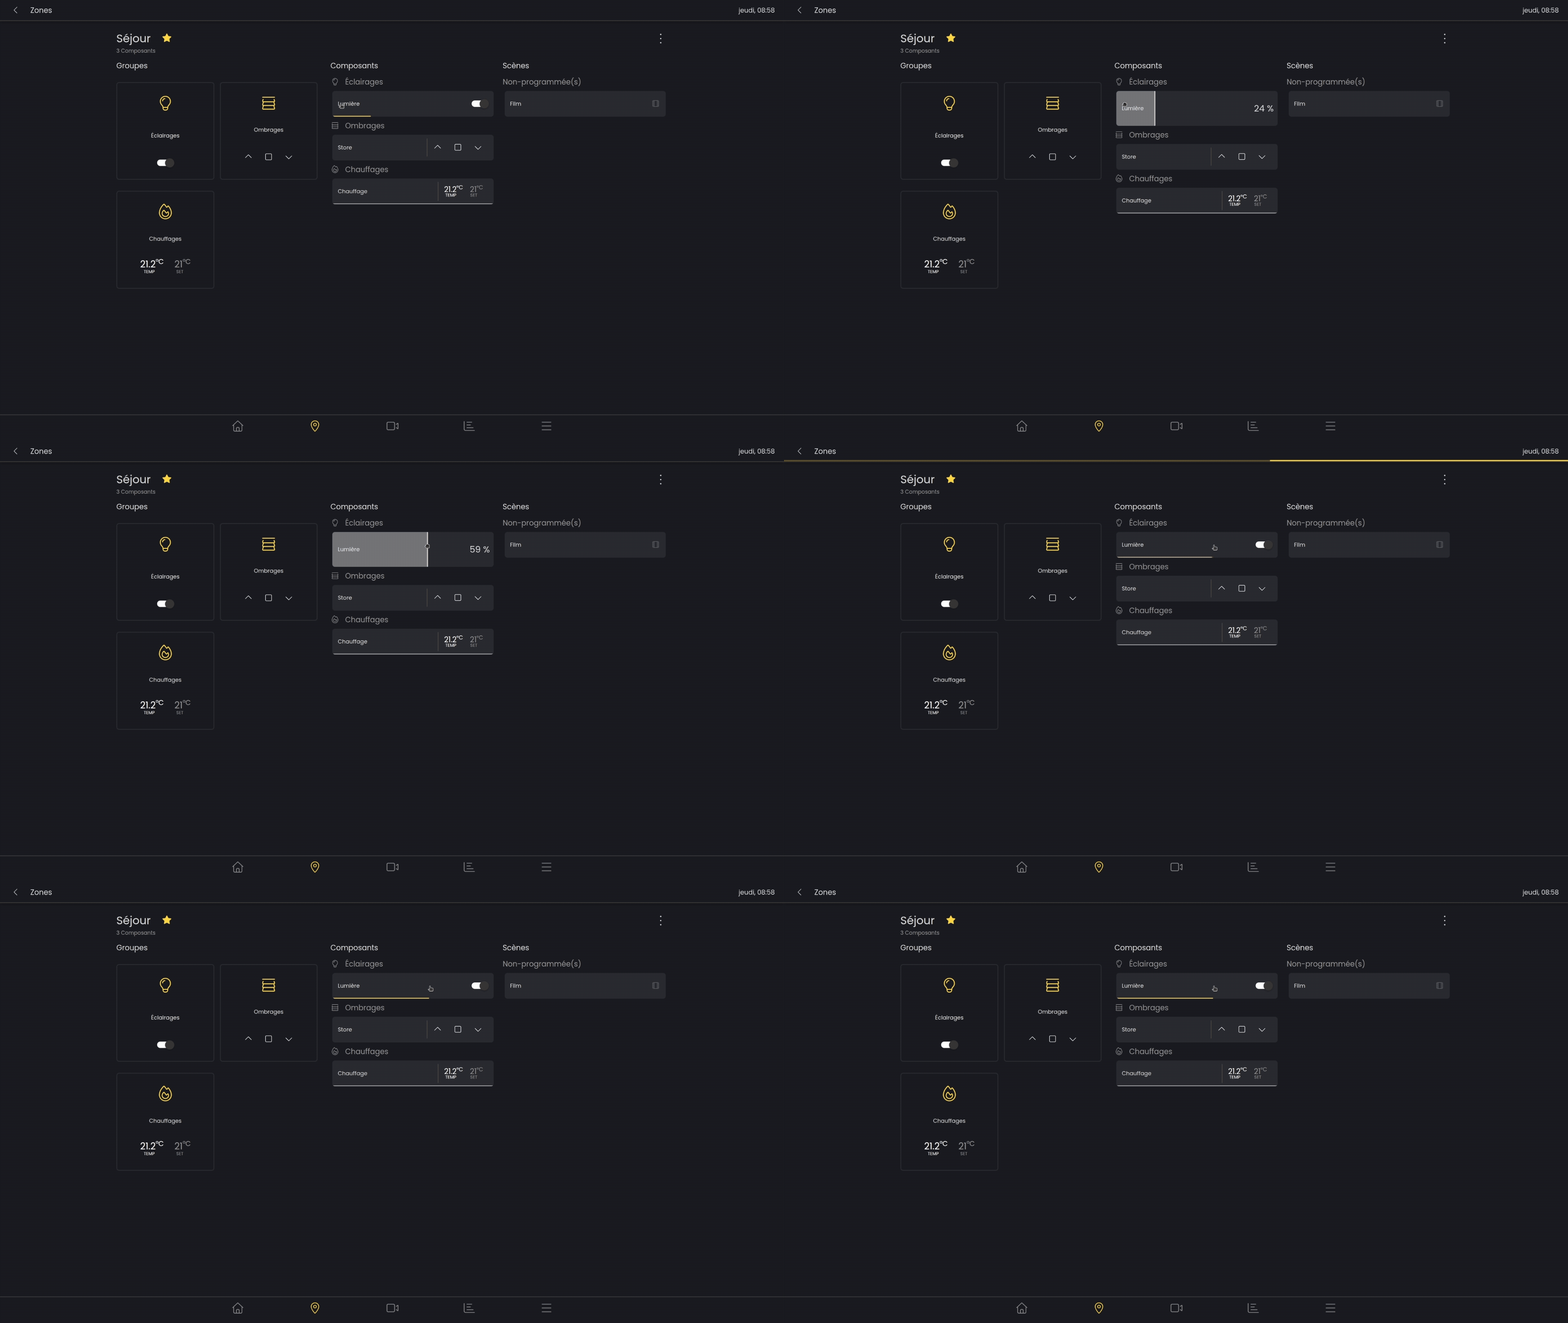
You can see that once the press is released, the grey bar is set to the correct percentage. The yellow bar then progresses according to the status received from the component.
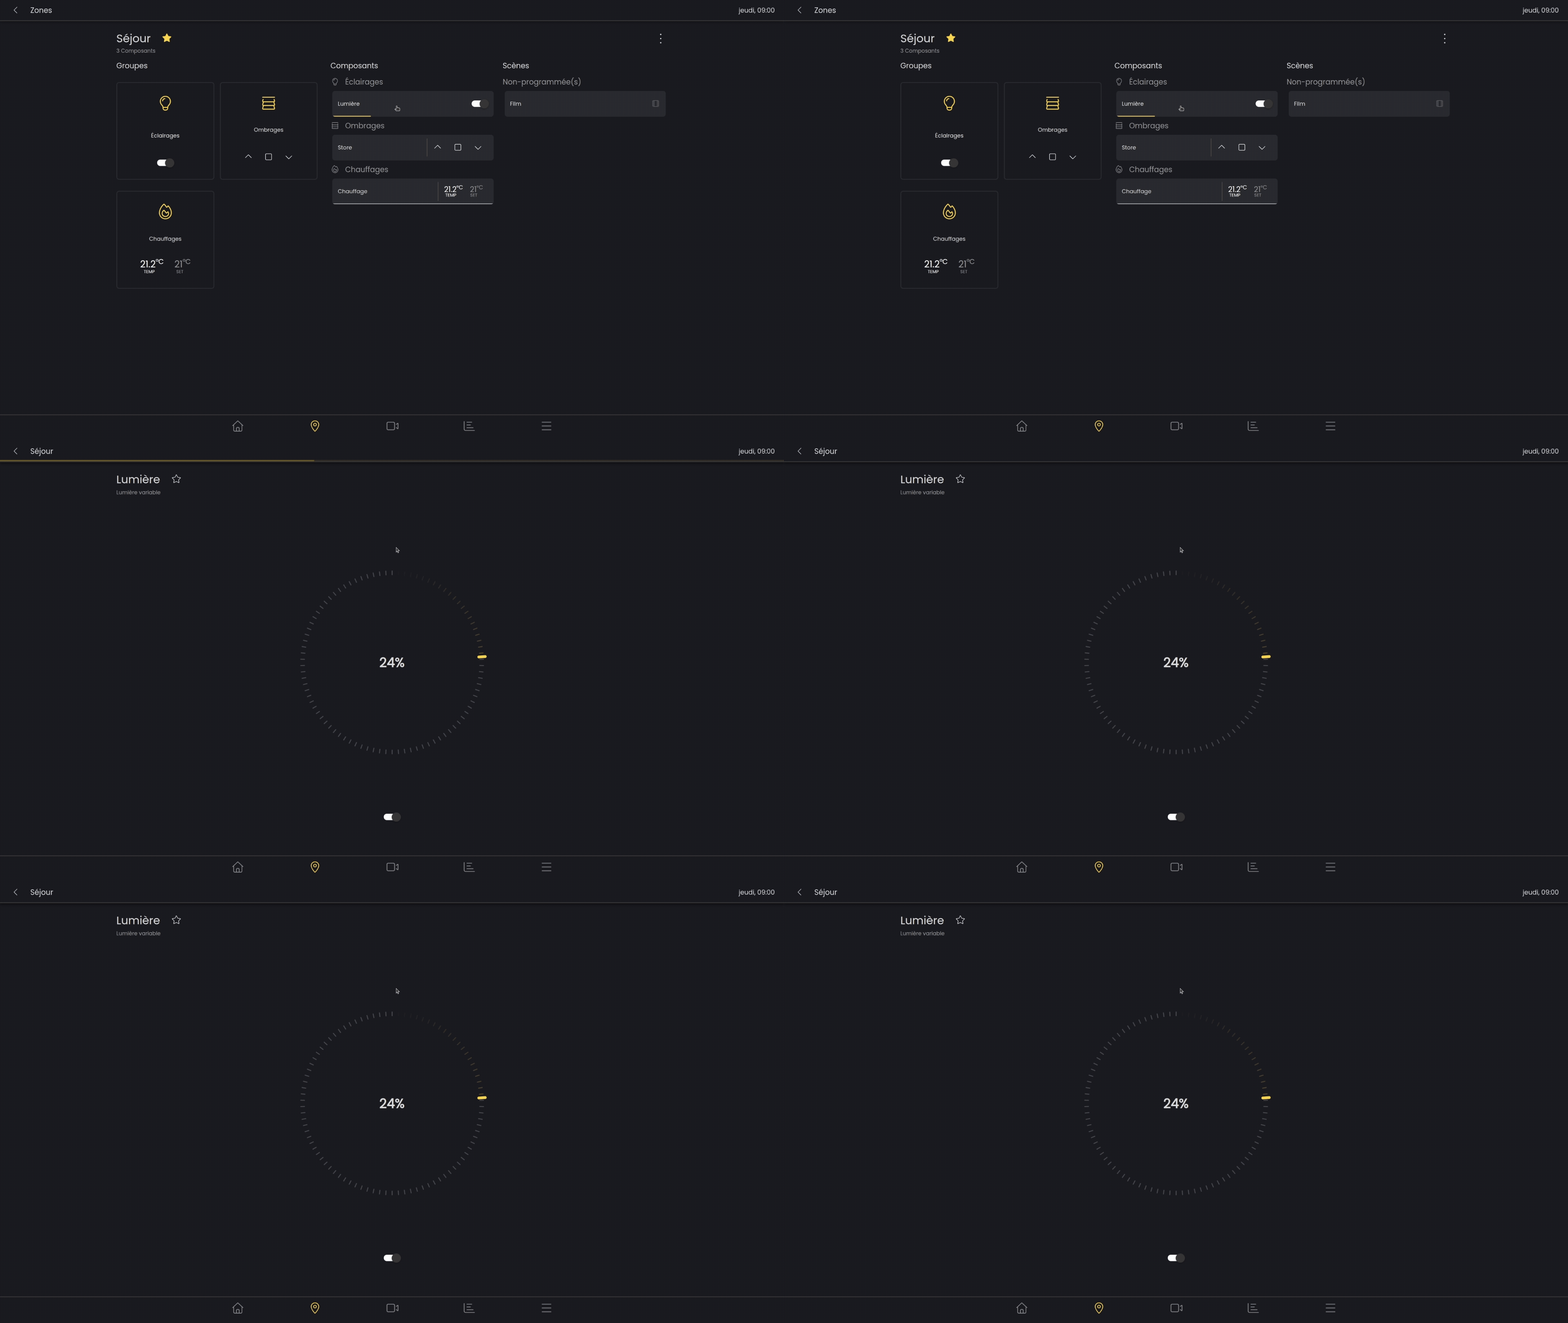
Component detail
To access the detail view, a single click is required, which gives access to the component view.
Scenes
The 3rd section is the scenes part. For each zone, it is possible to create, edit and activate scenes. These scenes are linked to the zone. They can also be found in the third main tab along with the favorite scenes.
To configure or edit a scene, see the “Scenes” page.
Create a scene
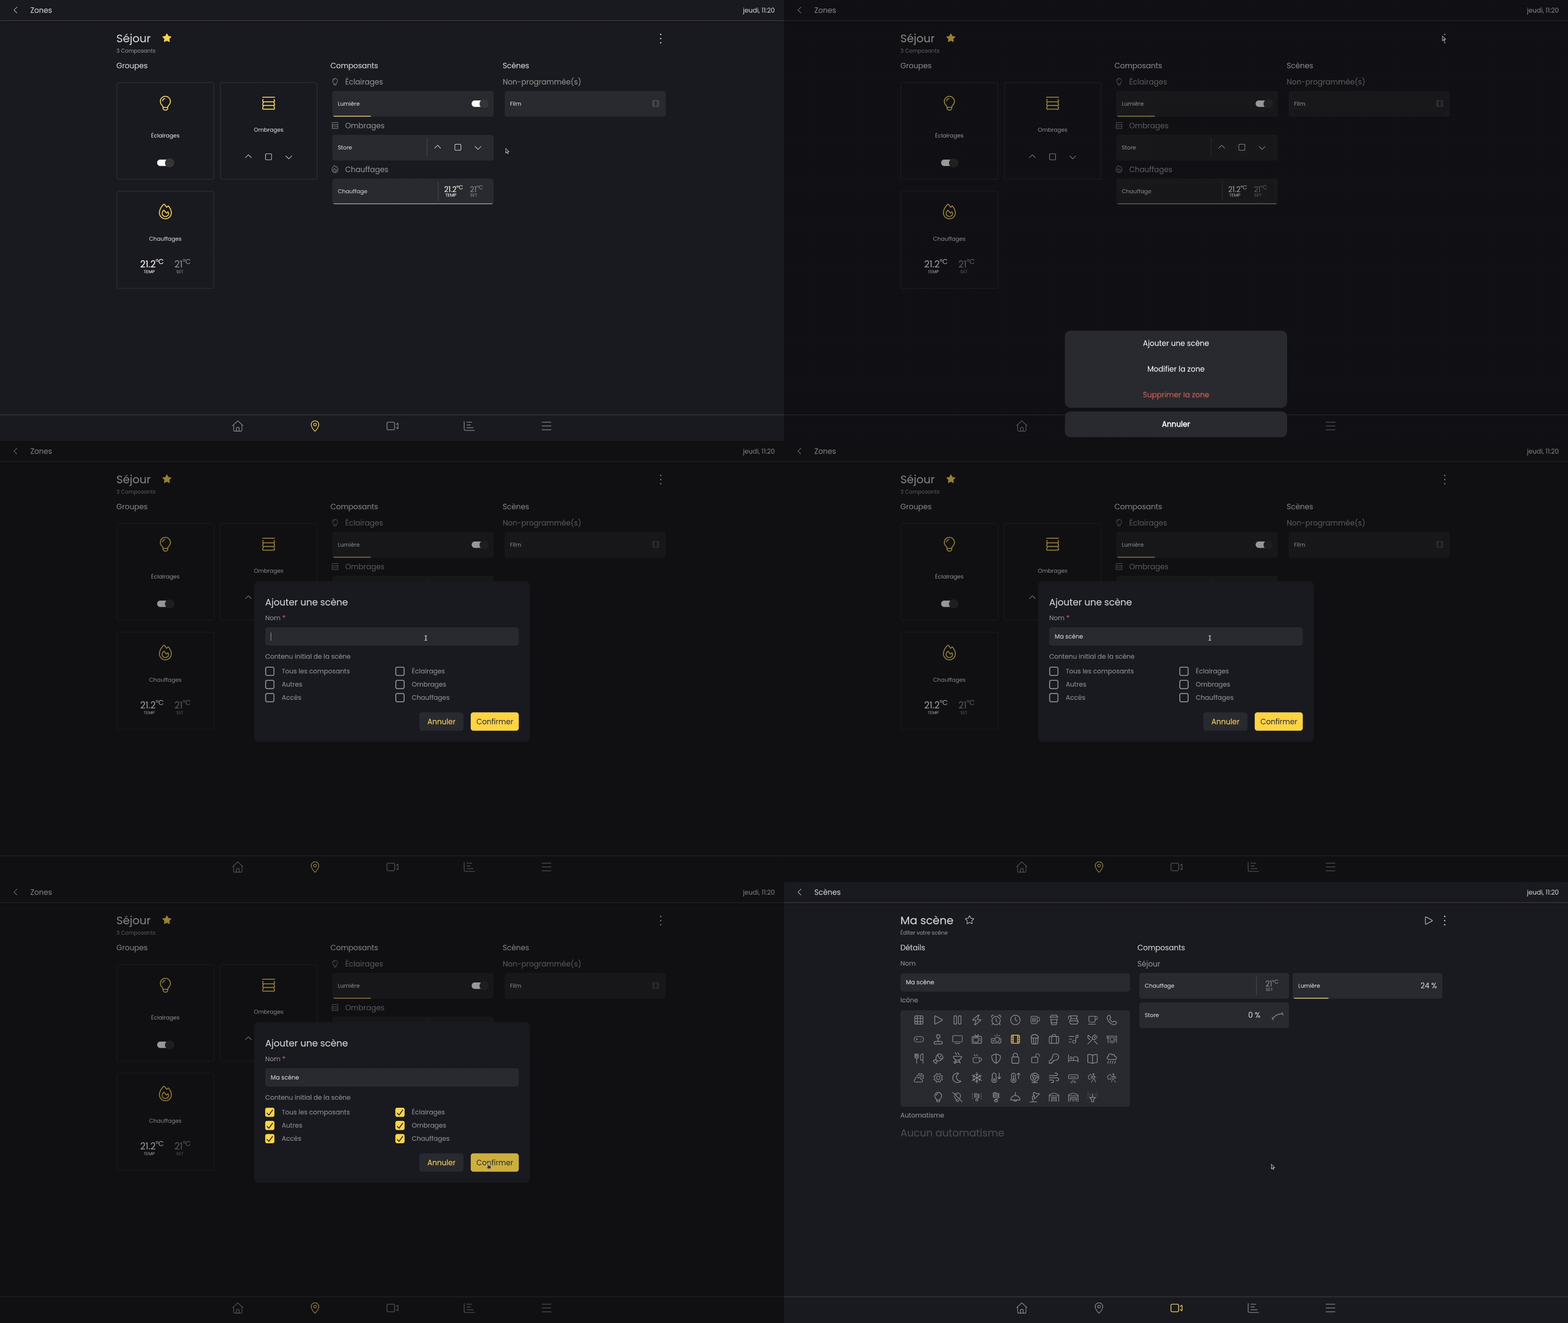
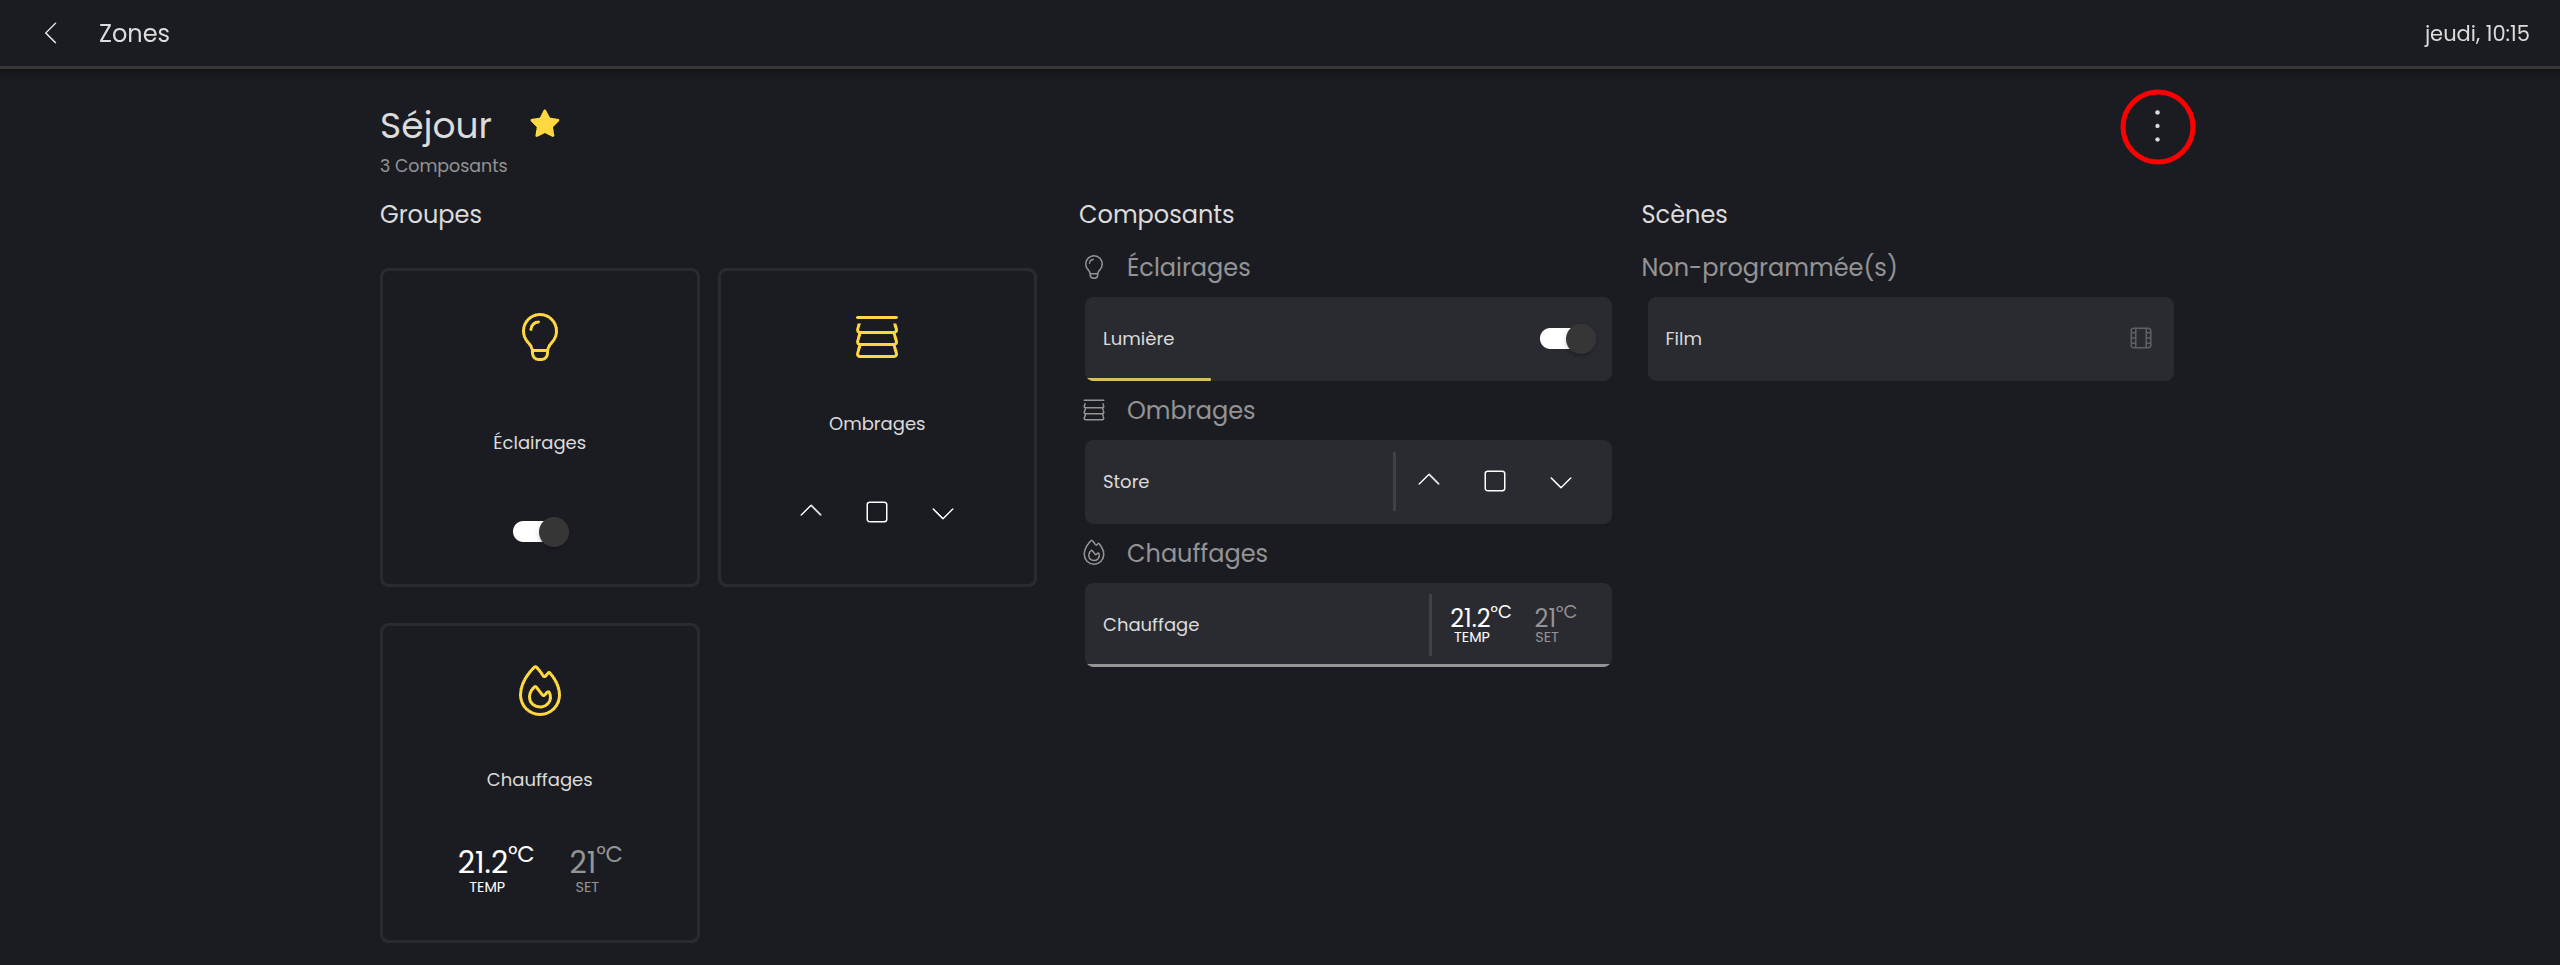
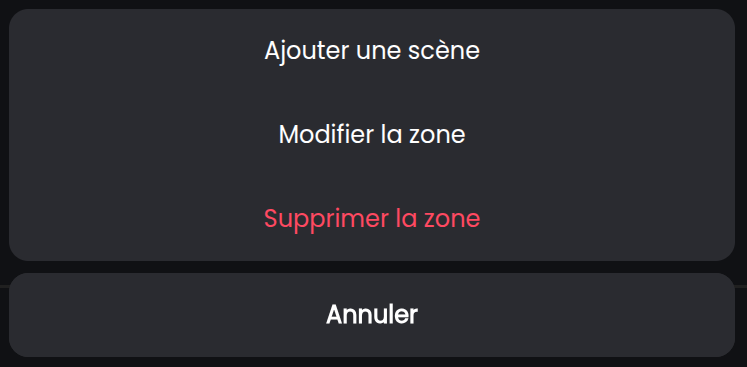
Creating a scene linked to the zone is done directly from the zone. Once the components of the zone are in the desired state, click on the icon with the 3 dots, then “Add a scene”.
A window opens and asks for the name of the new scene.
For scene configuration, see the “Scenes” page.
Activate a scene
To activate a scene, a simple click on the scene activates it.
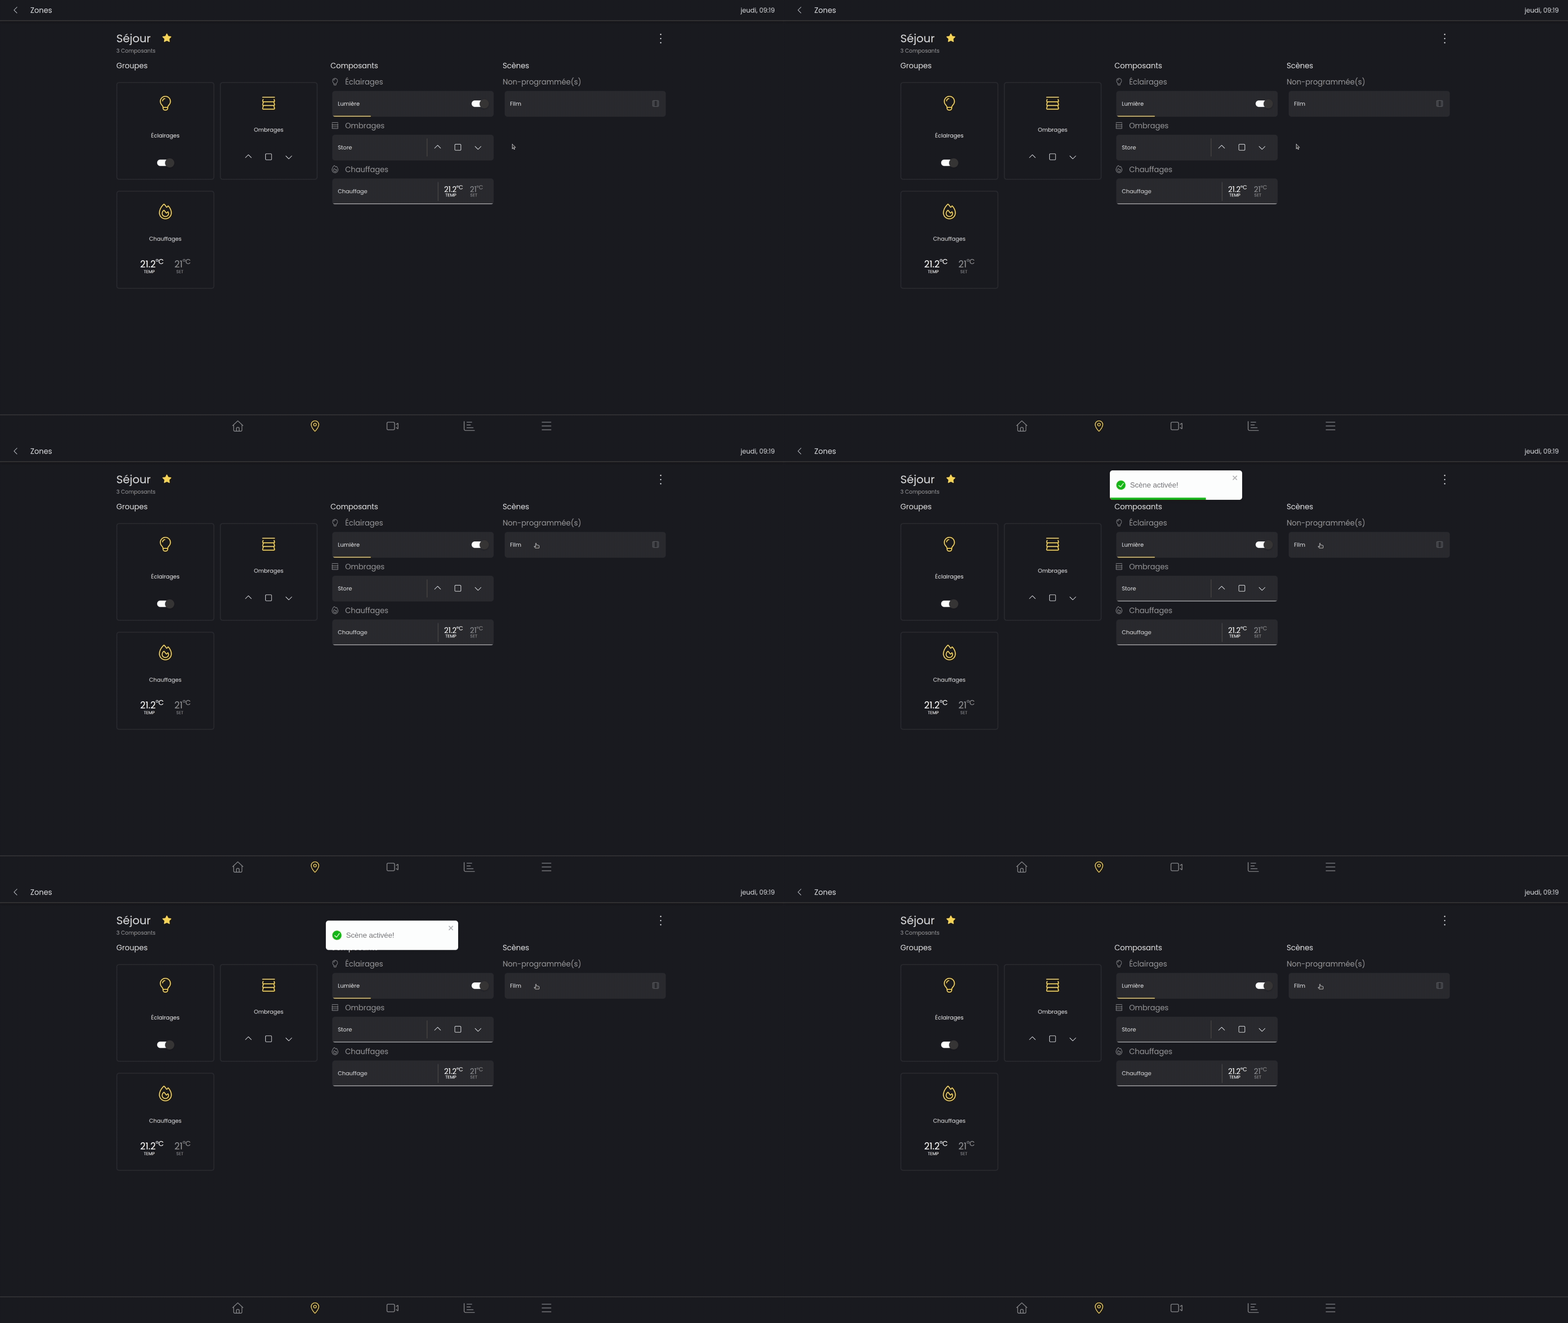
If you want to quickly edit the scene, a long press can be performed. (See the “Scenes” page)
Add a zone
To add a zone, on the Spaces and Zones page, click the three dots in the top right, then click “Add a zone”.
Edit or delete a zone
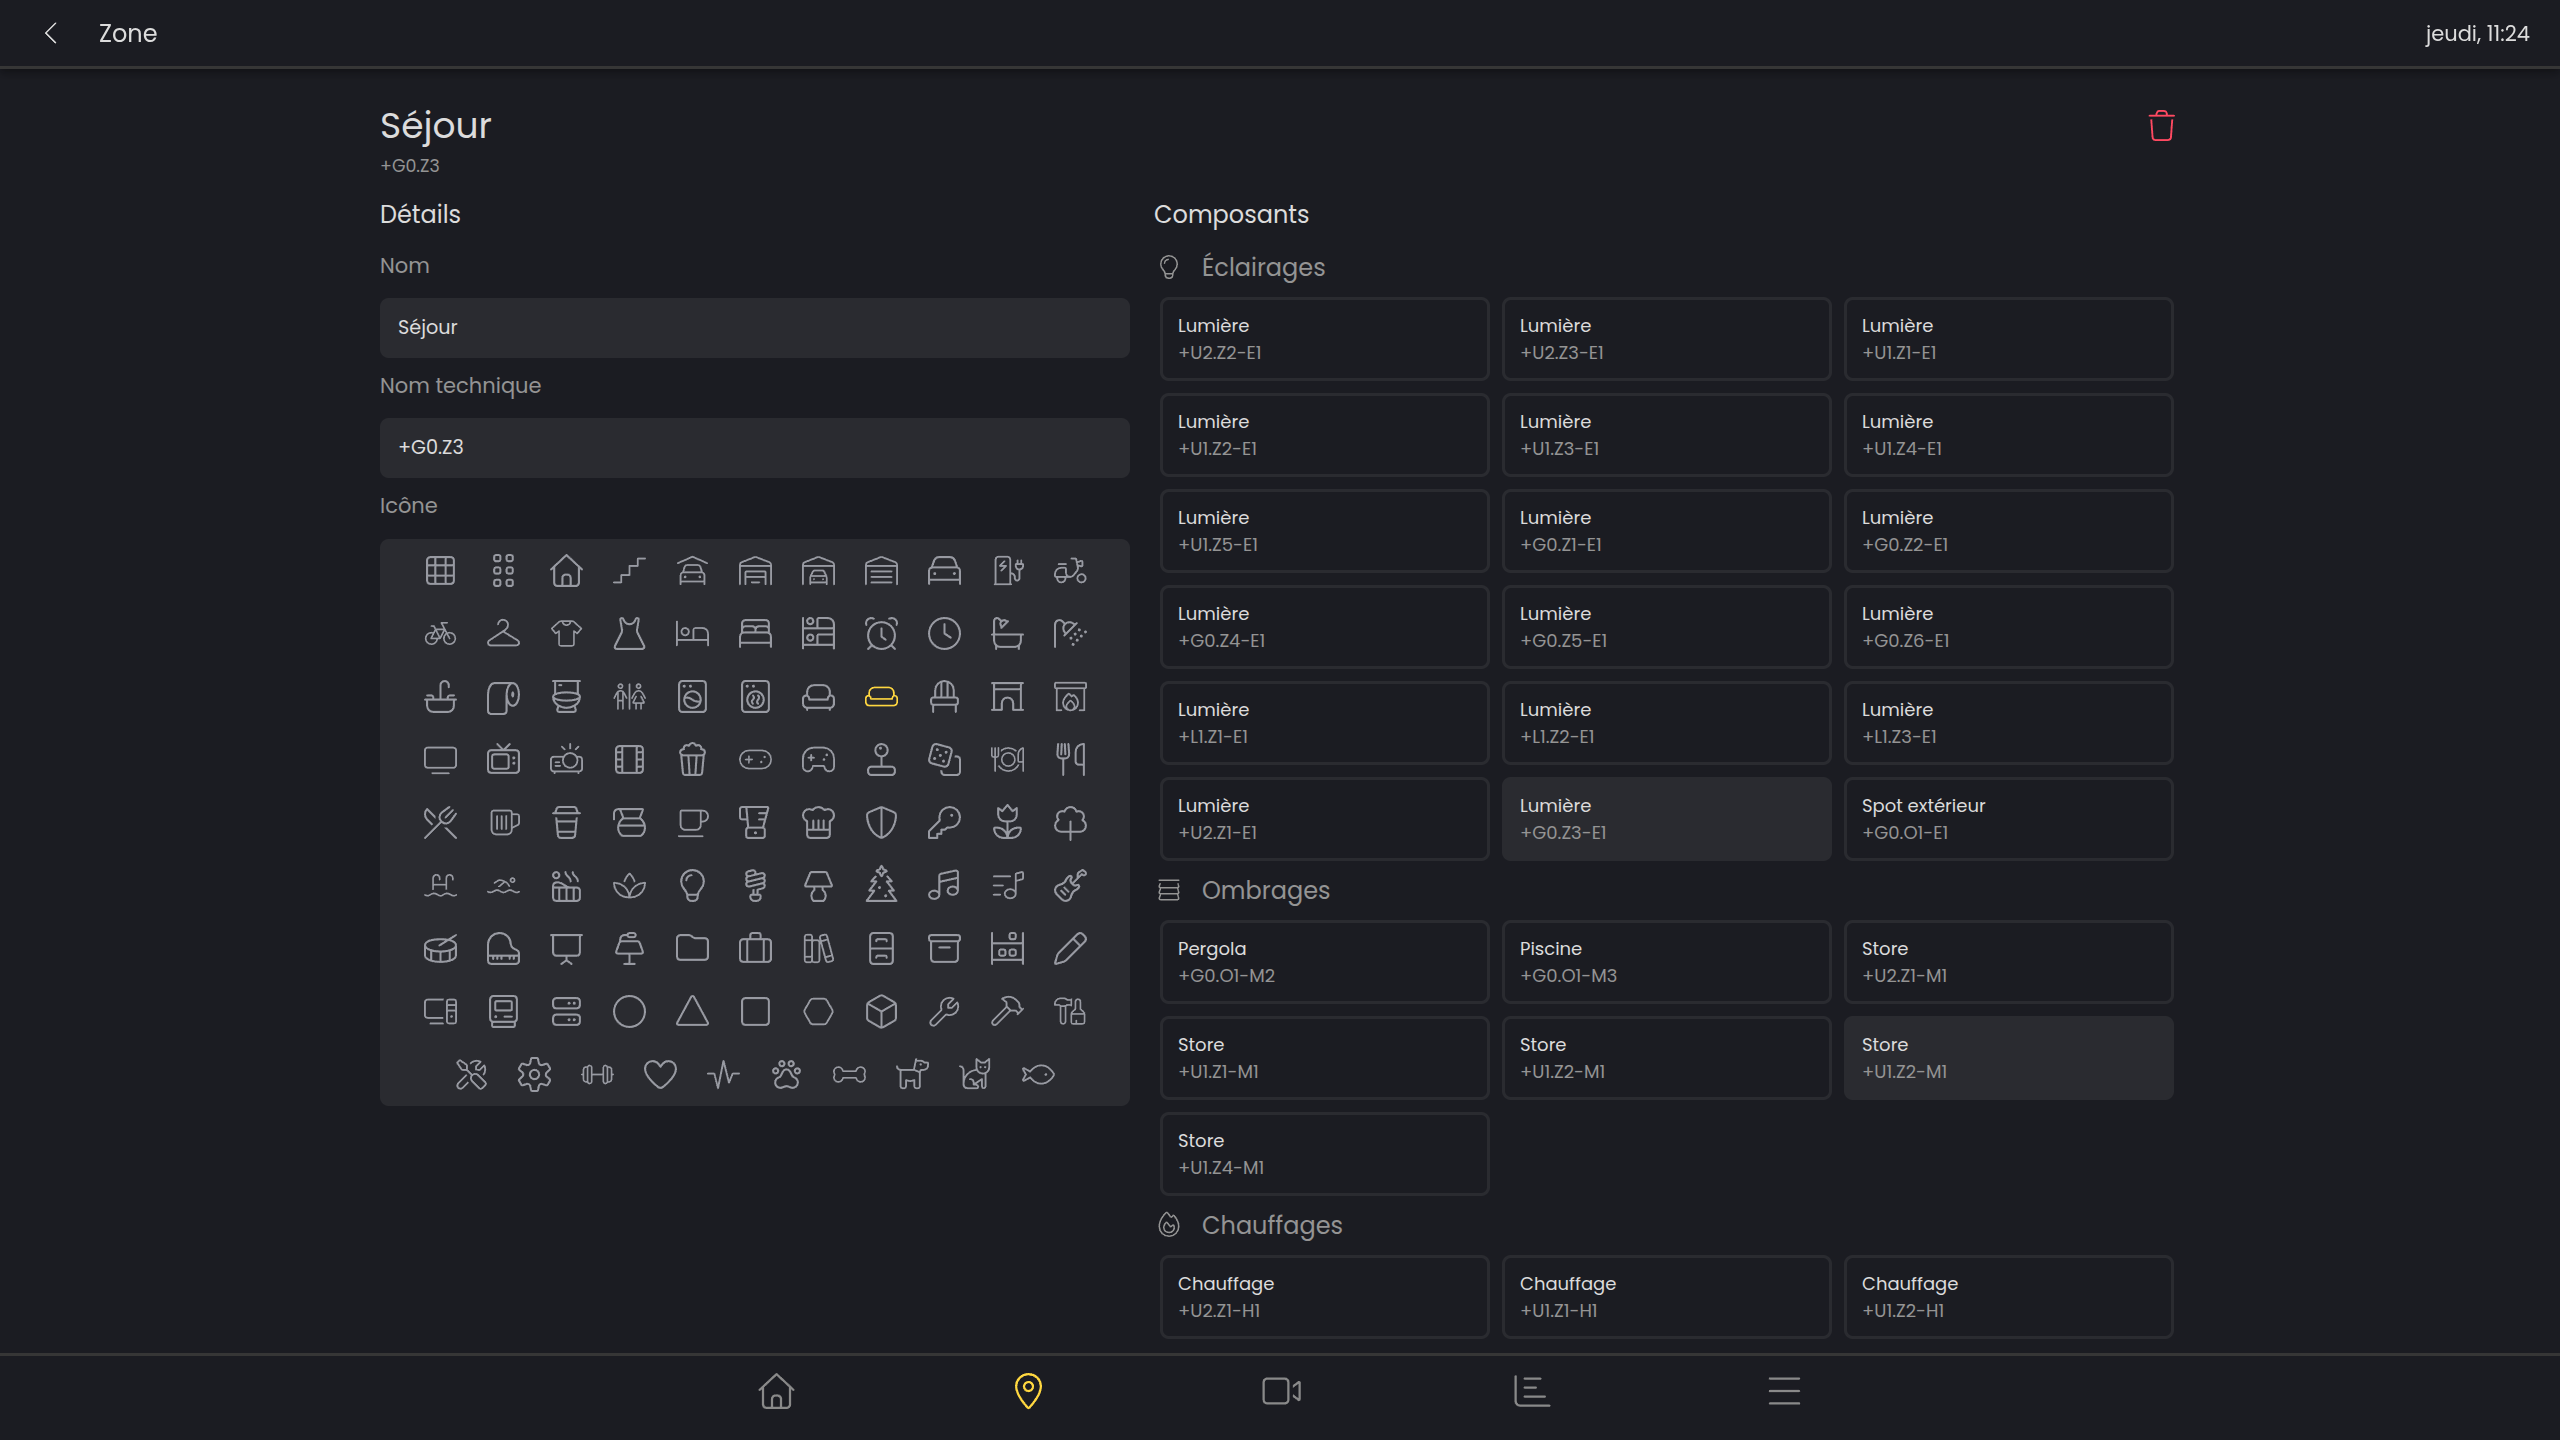
To edit or delete a zone, on the zone page, click the three dots in the top right, then click “Edit zone”.
On the left, you can edit the name and icon of the zone.
On the right, you can find lists based on component types (for example lights or shading devices). Simply click on the component to add or remove it from the zone.
Assign/move a zone into a space
To assign a zone to a space, press and hold the zone card, then move it into another space and release to save.
Change the order of zones
To change the order of zones within a space, press and hold the zone card, then move it left/right and release to save.